
Your First Day With FabWise
A start-to-finish walkthrough for a brand-new admin. Set up your shop, get your team in, pair a kiosk, and have your first worker clocked in by lunch.
Why it matters
You signed up for FabWise. Now what?
This guide walks you through the first day end-to-end. It links out to detailed help articles for each piece, but follow this in order and you'll be live by the end of the day. Most shops are running real shifts on the kiosk within 2–3 hours.
The plan
By the end of today, you'll have:
- Your shop's basic information in
- Your team's departments created
- Your workers in the system with PINs
- A schedule assigned to each department
- An Android tablet or iPad paired as a kiosk on your shop floor
- Your first worker clocked in
Optional but recommended:
- Workstation set up on your phone, so you can see what your workers see
- Customer Portal published, so customers can find you online
We'll do the required steps first, then circle back to the optional ones.
Step 1. Sign in and finish your shop's profile (5 minutes)
Go to admin.fabwise.app and sign in with the email from your signup — we'll email you a sign-in link (no password). You can also set up a passkey for faster sign-in after your first visit. You'll land on the Dashboard — this is home base once your shop is running.
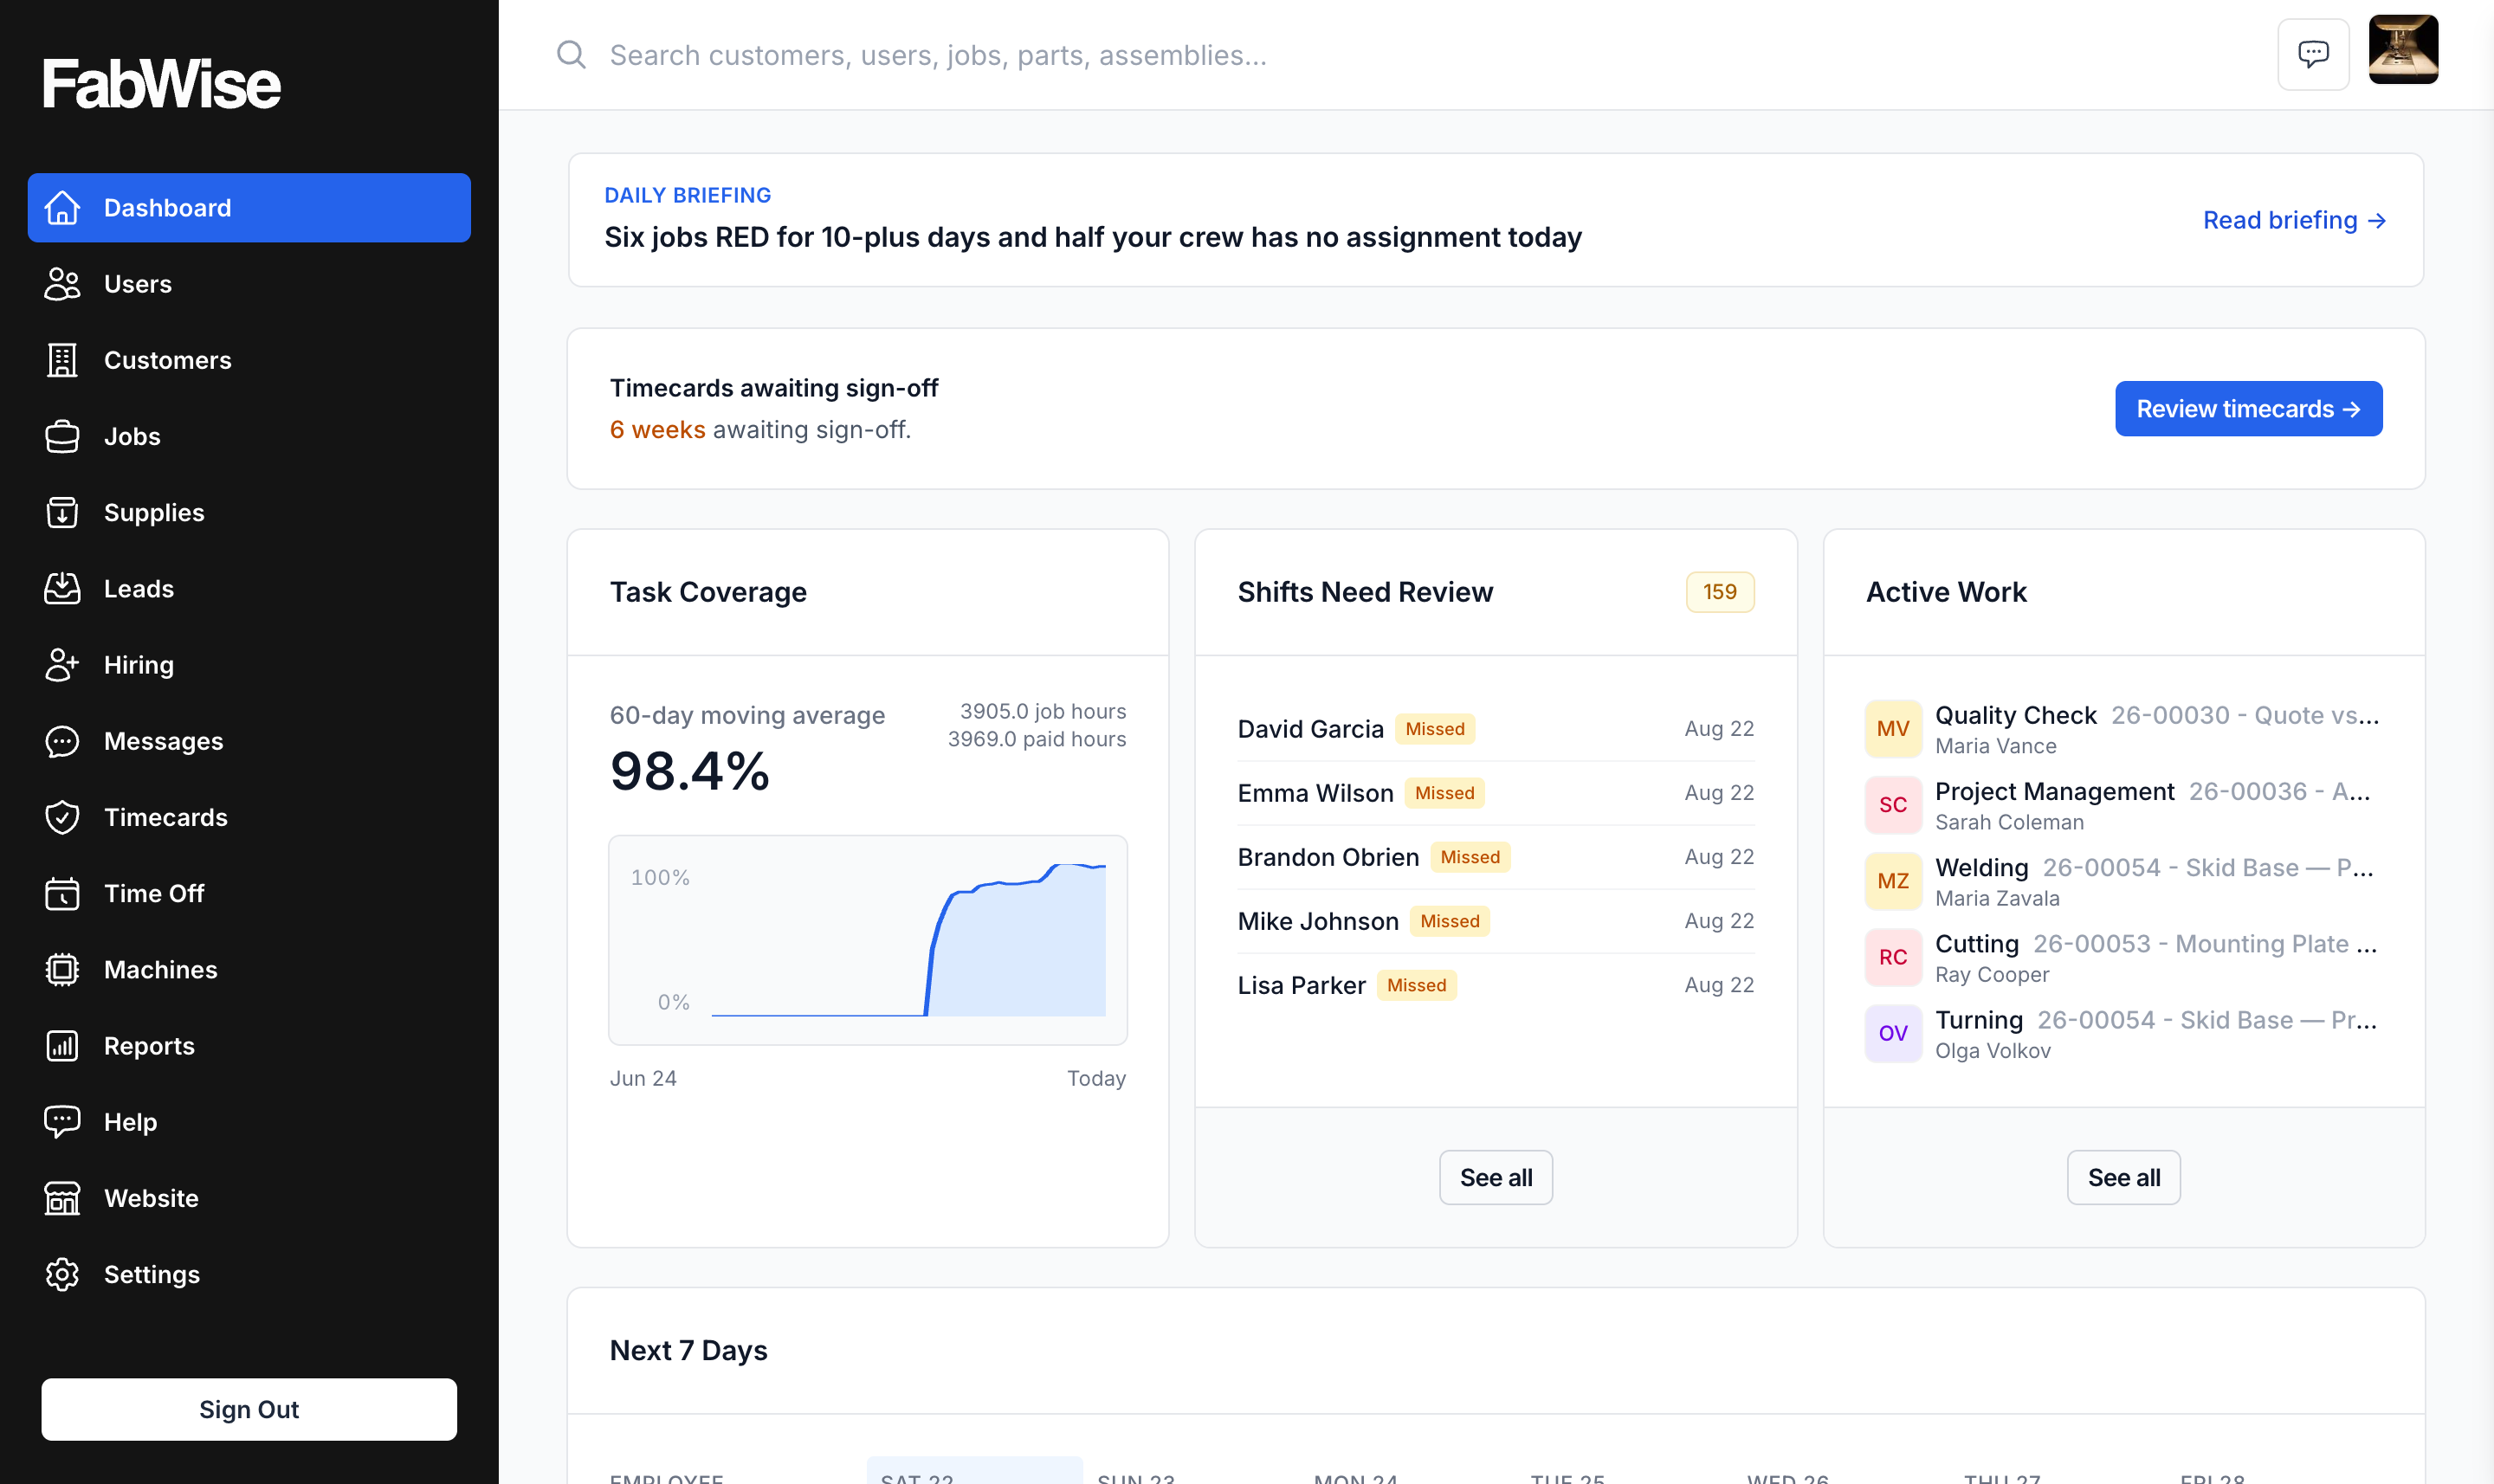
Click Settings → Company.
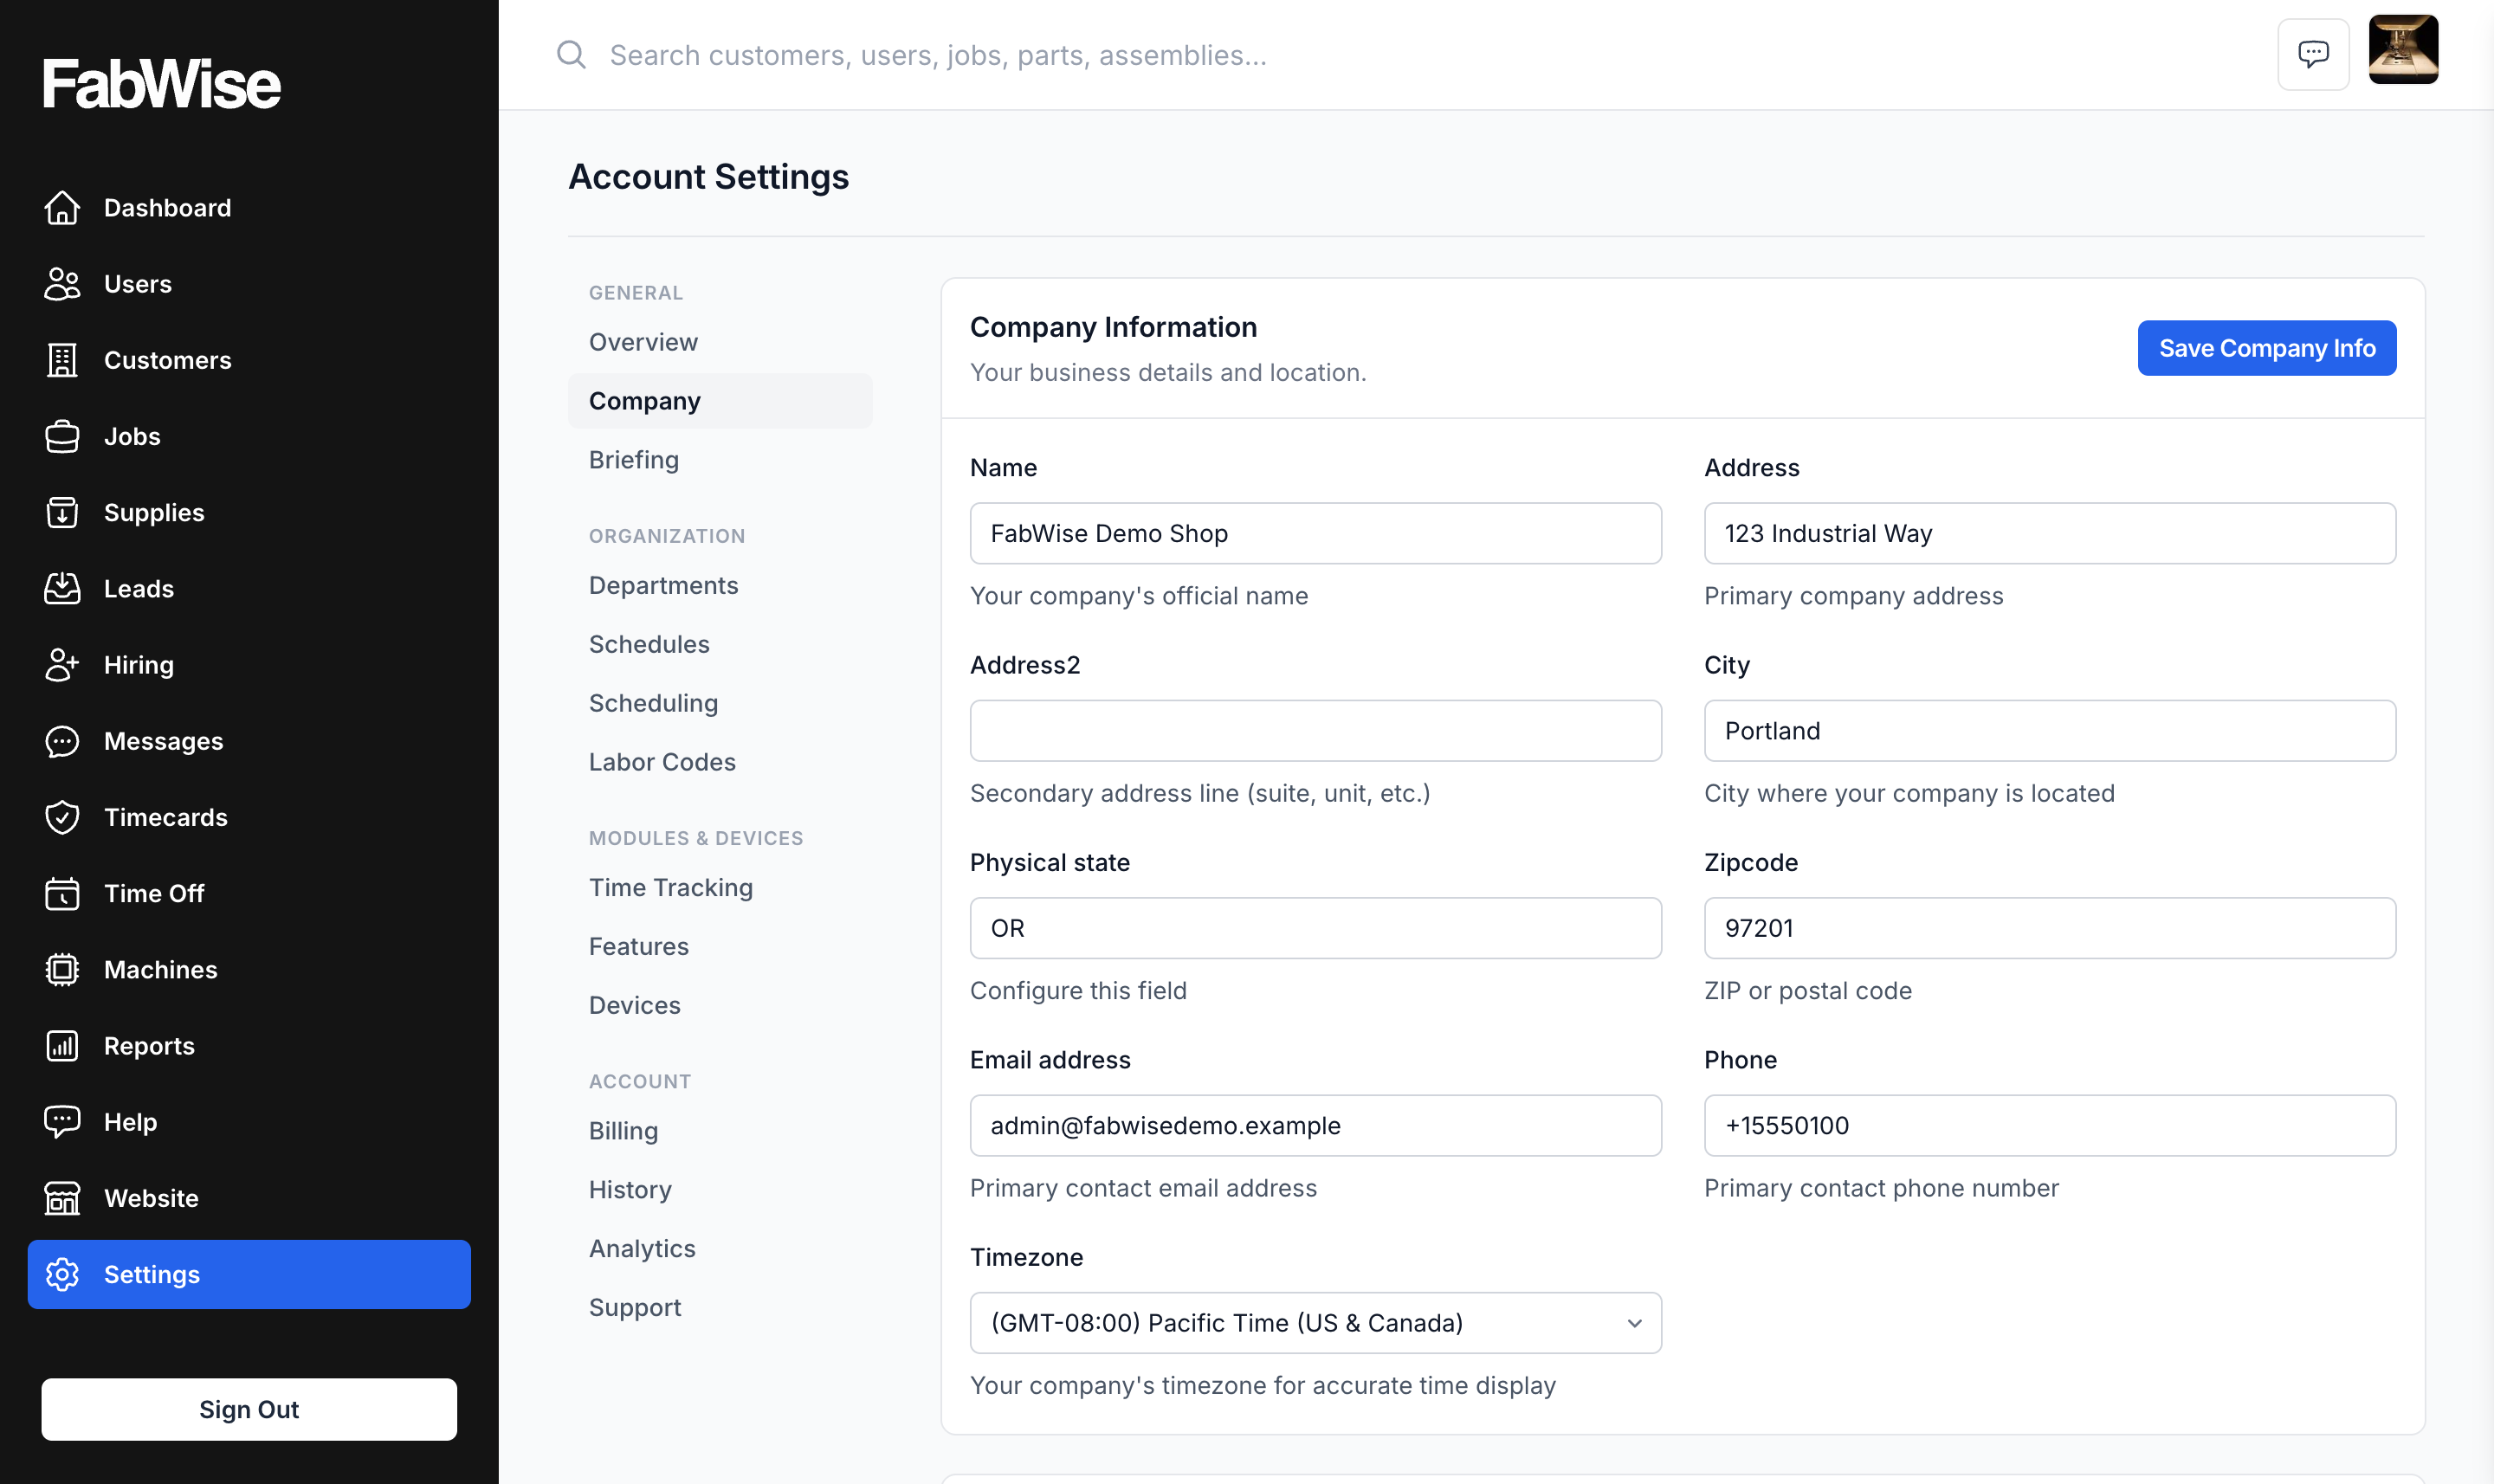
Fill in:
- Shop name — your business name
- Logo — drag in your logo image (used on the kiosk, Workstation, customer portal, and exports)
- Brand color — pick a color that matches your logo
- Timezone — pick your shop's local timezone (this matters — all times in FabWise are stored UTC but displayed in your timezone)
- Address — your shop's physical address
Click Save.
Your logo and brand color now appear across the kiosk, Workstation, customer portal, exports, and emails.
Step 2. Create your departments (5 minutes)
A department is how you group workers. Examples: Production, Assembly, QA. Each department gets one schedule.
Go to Settings → Departments.
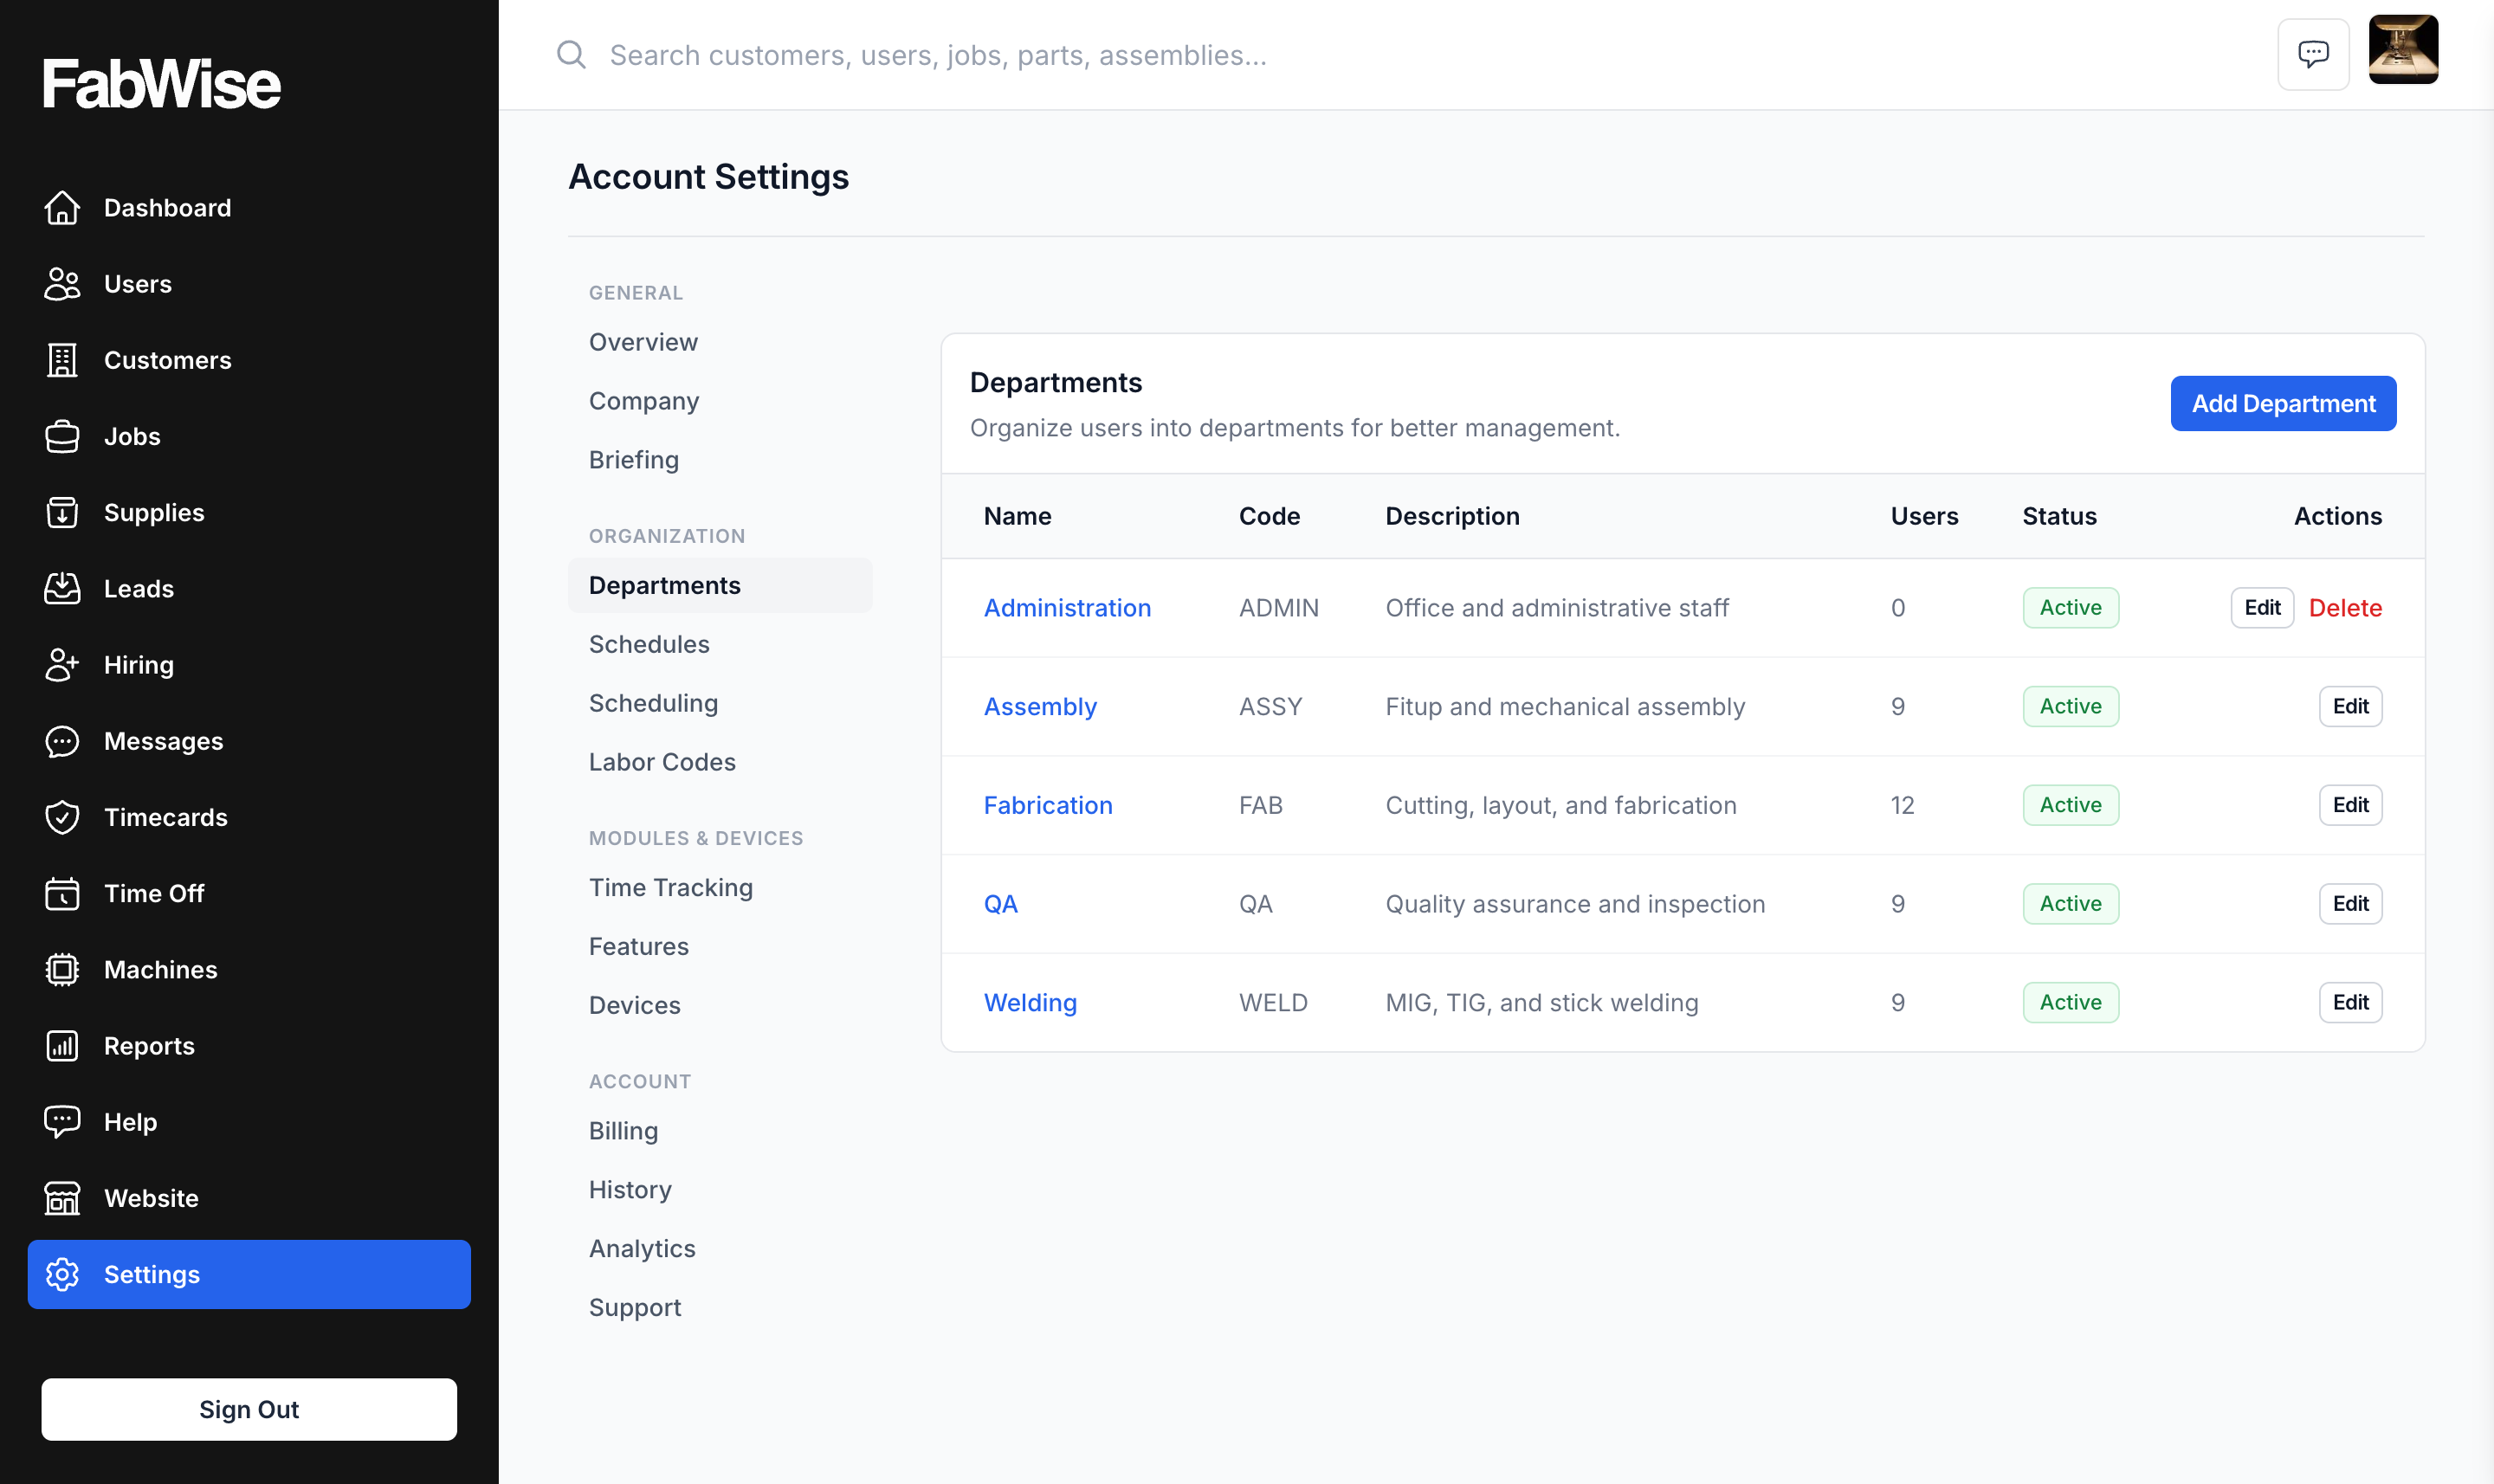
Click Add Department.
Type the department name and click Save.
Repeat for each department.
If you only have one team and aren't sure how to group, start with a single department called "Shop" — you can split later.
For the full guide, see Setting Up Departments and Workers.
Step 3. Create your first schedule (5 minutes)
A schedule is your work week — what days and hours your team is expected on shift.
- Go to Settings → Schedules.
- Click Create Schedule.
- Name it (e.g., "Day Shift").
- For each day Monday–Friday, set start time and end time (e.g., 7:00 AM to 3:30 PM with a 30-minute meal break). Mark Saturday and Sunday as inactive (or set them up if your shop runs weekends).
- Click Save.
- Go back to Settings → Departments. Click each department and assign your new schedule.
FabWise now knows when your workers are expected on shift and will generate their daily shifts automatically.
For more, see Schedules.
Step 4. Add your workers (10–20 minutes)
For each shop floor worker:
- Go to Users → Add User.
Enter their first and last name — that's the whole form. Click Create user.
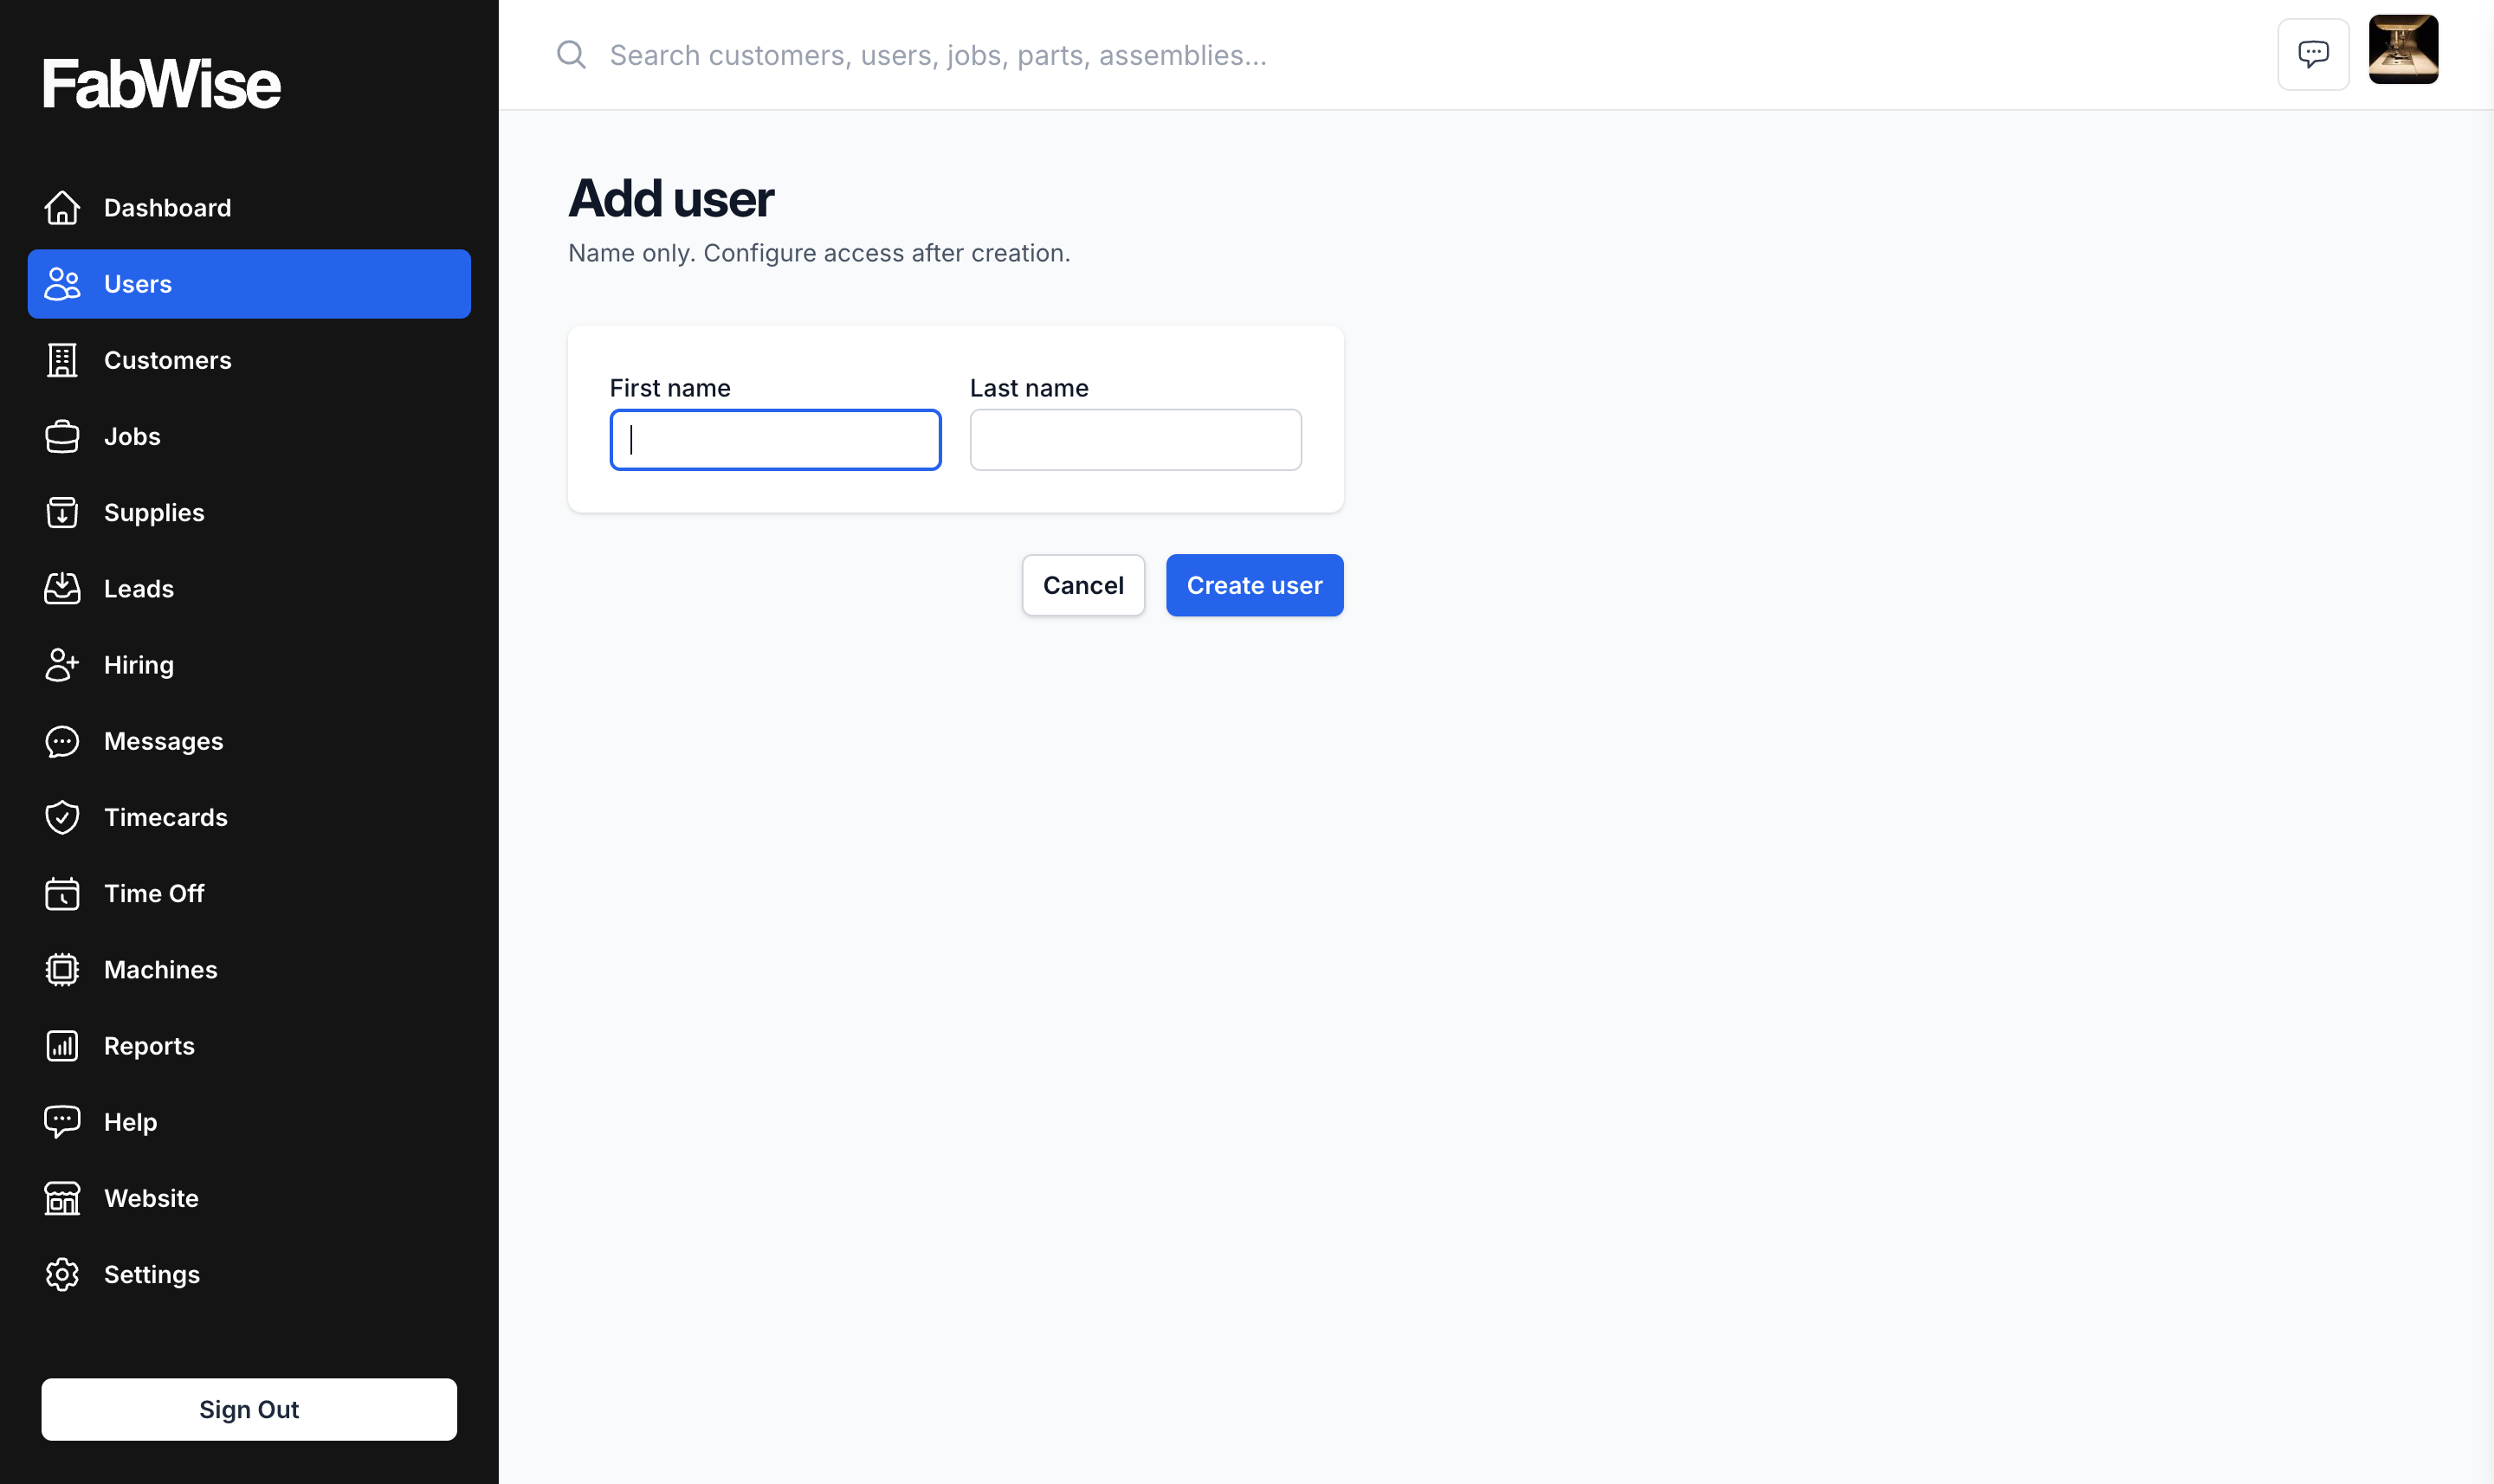
Configure the rest on the new user's profile:
- Open the Devices tab and turn on Kiosk access — this marks them as a time-tracked worker and reveals the PIN field. Set a 4-digit PIN (unique across your account, so don't use 1234 for everyone).
- On the Details card, set their Department (drives their schedule), Title, and Supervisor. Email and phone are optional for shop workers.
- Set an Hourly Rate if you're using job costing.
Repeat for everyone on the shop floor.
For office team (managers, supervisors, additional admins), create the user the same way, then set their Role and email on their profile — they sign in at admin.fabwise.app with an emailed link.
For more, see Setting Up Departments and Workers.
Step 5. Pair a kiosk tablet (10–15 minutes)
The kiosk is the shared tablet workers tap to clock in and out. Pick an Android tablet or iPad — both work the same way for workers.
On your computer in the admin panel, go to Settings → Devices and make sure Enable kiosk access is on.
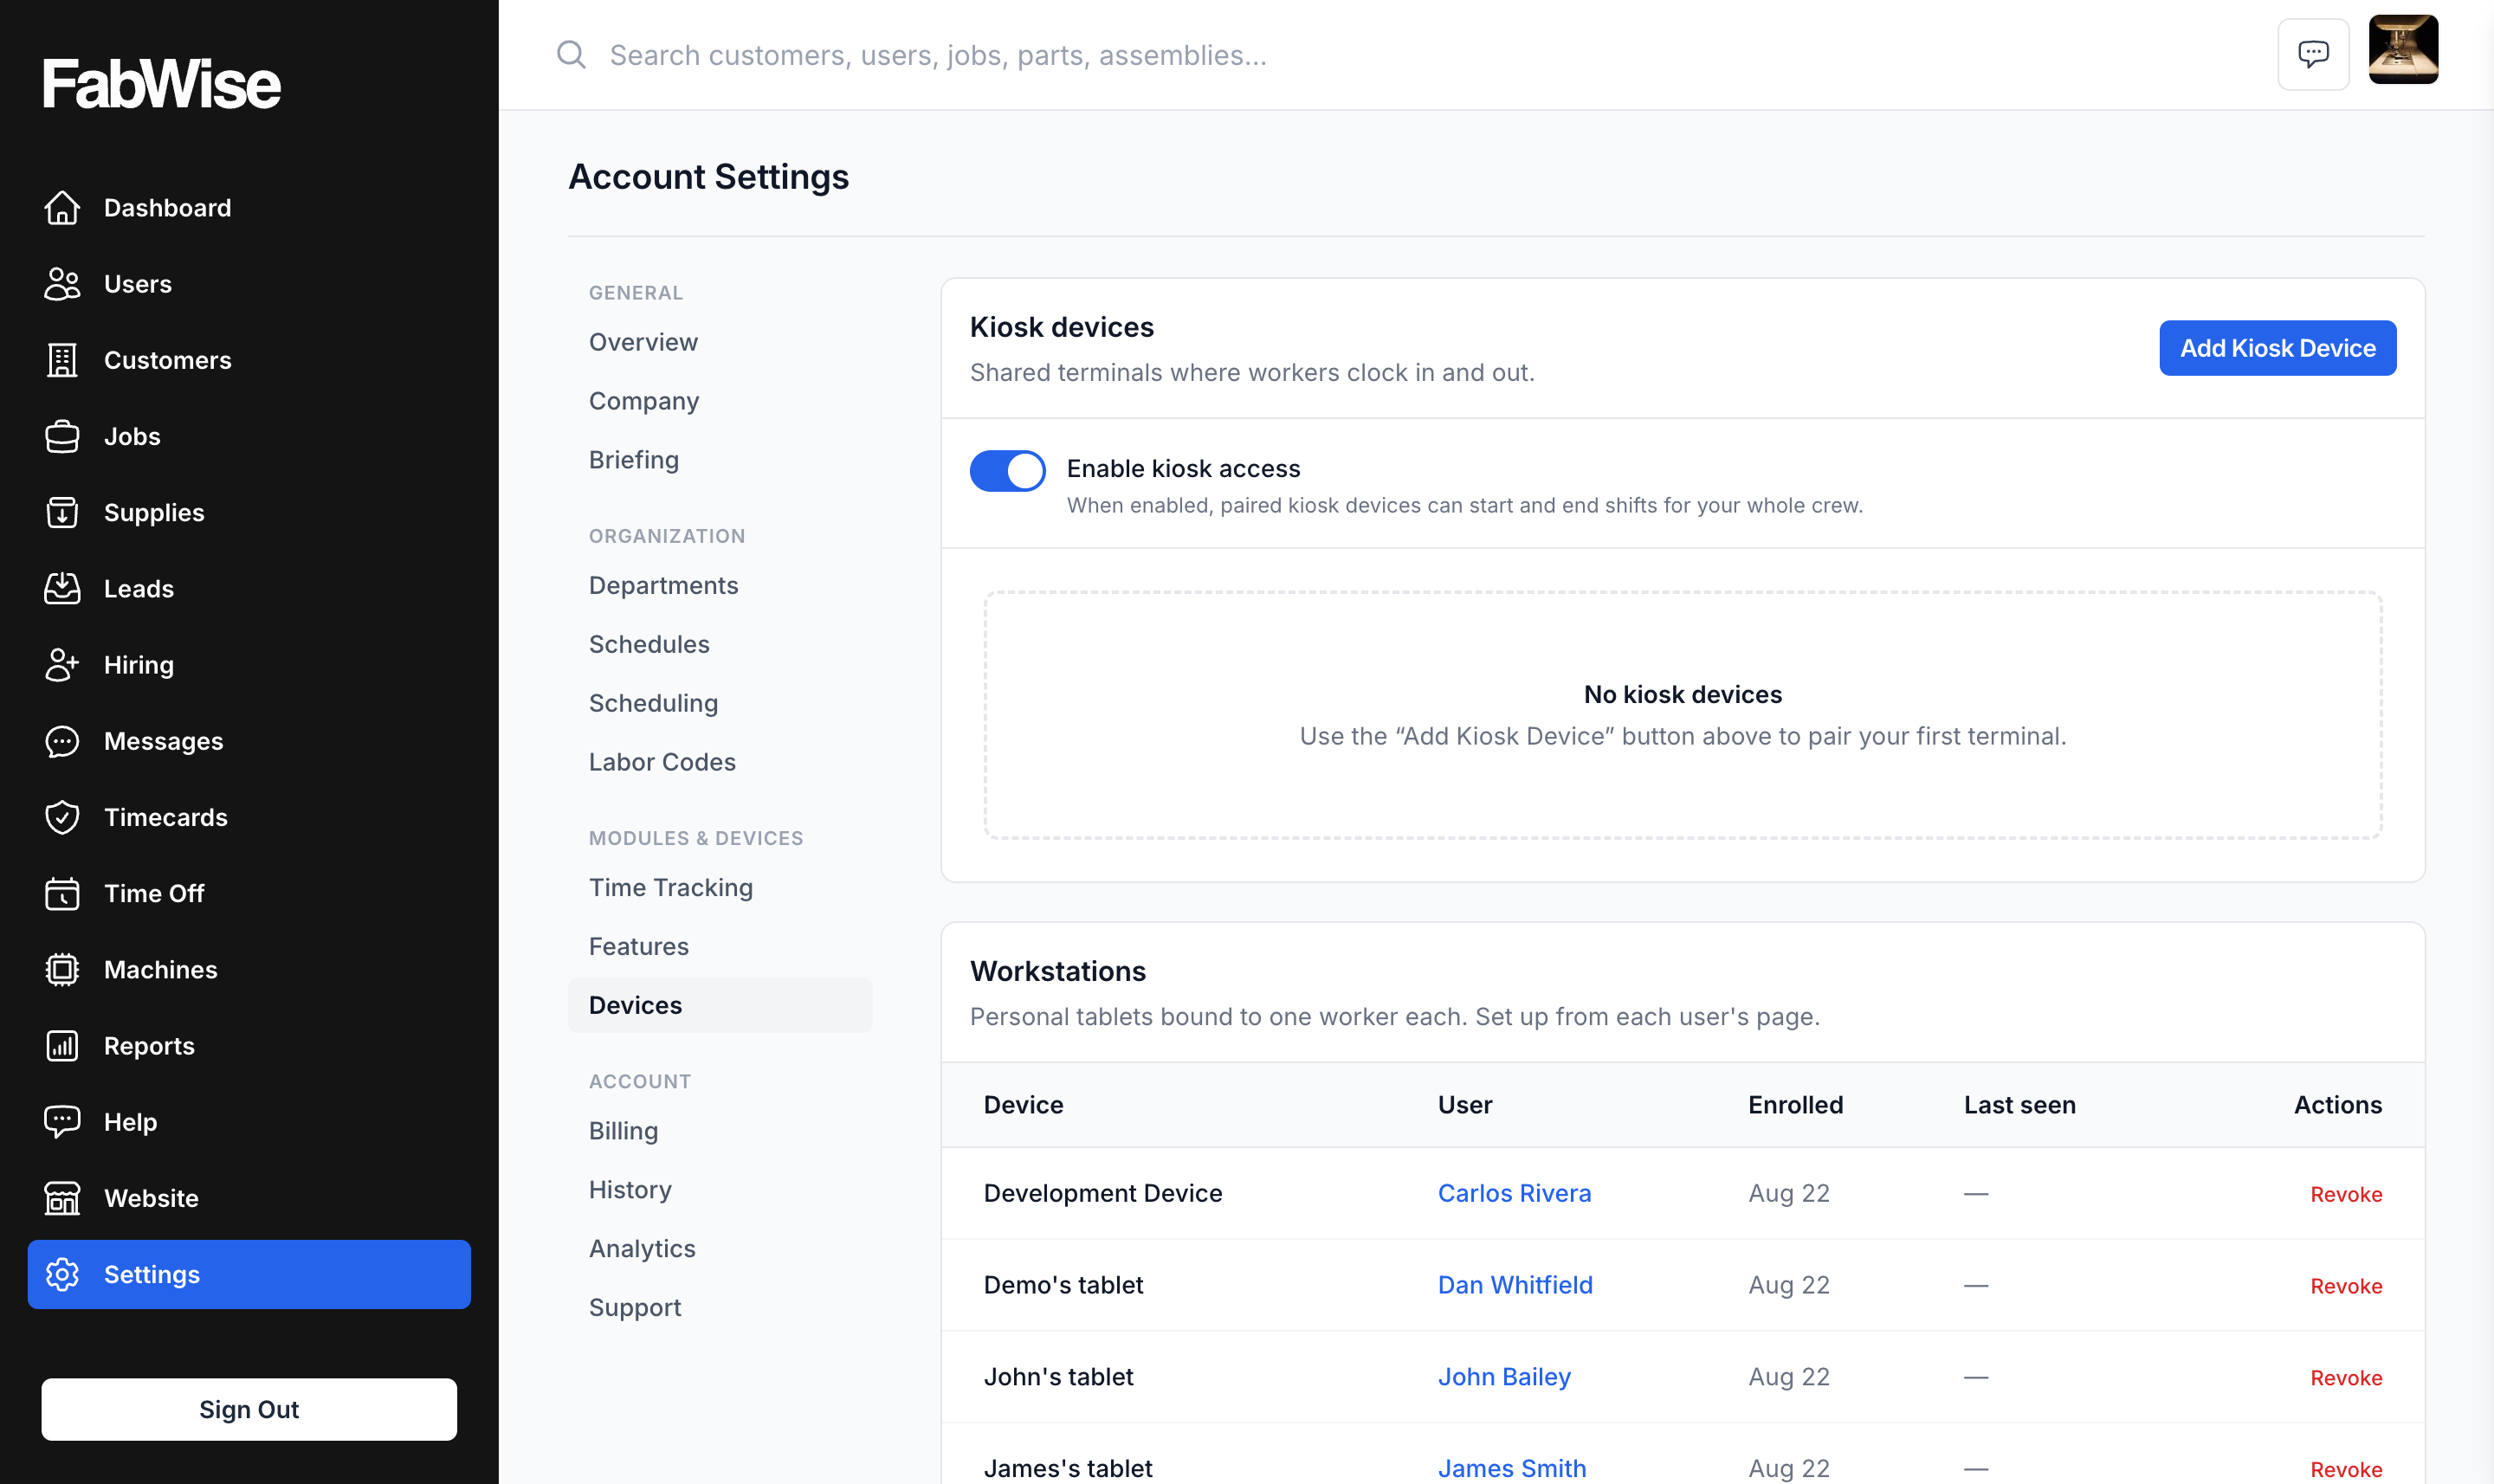
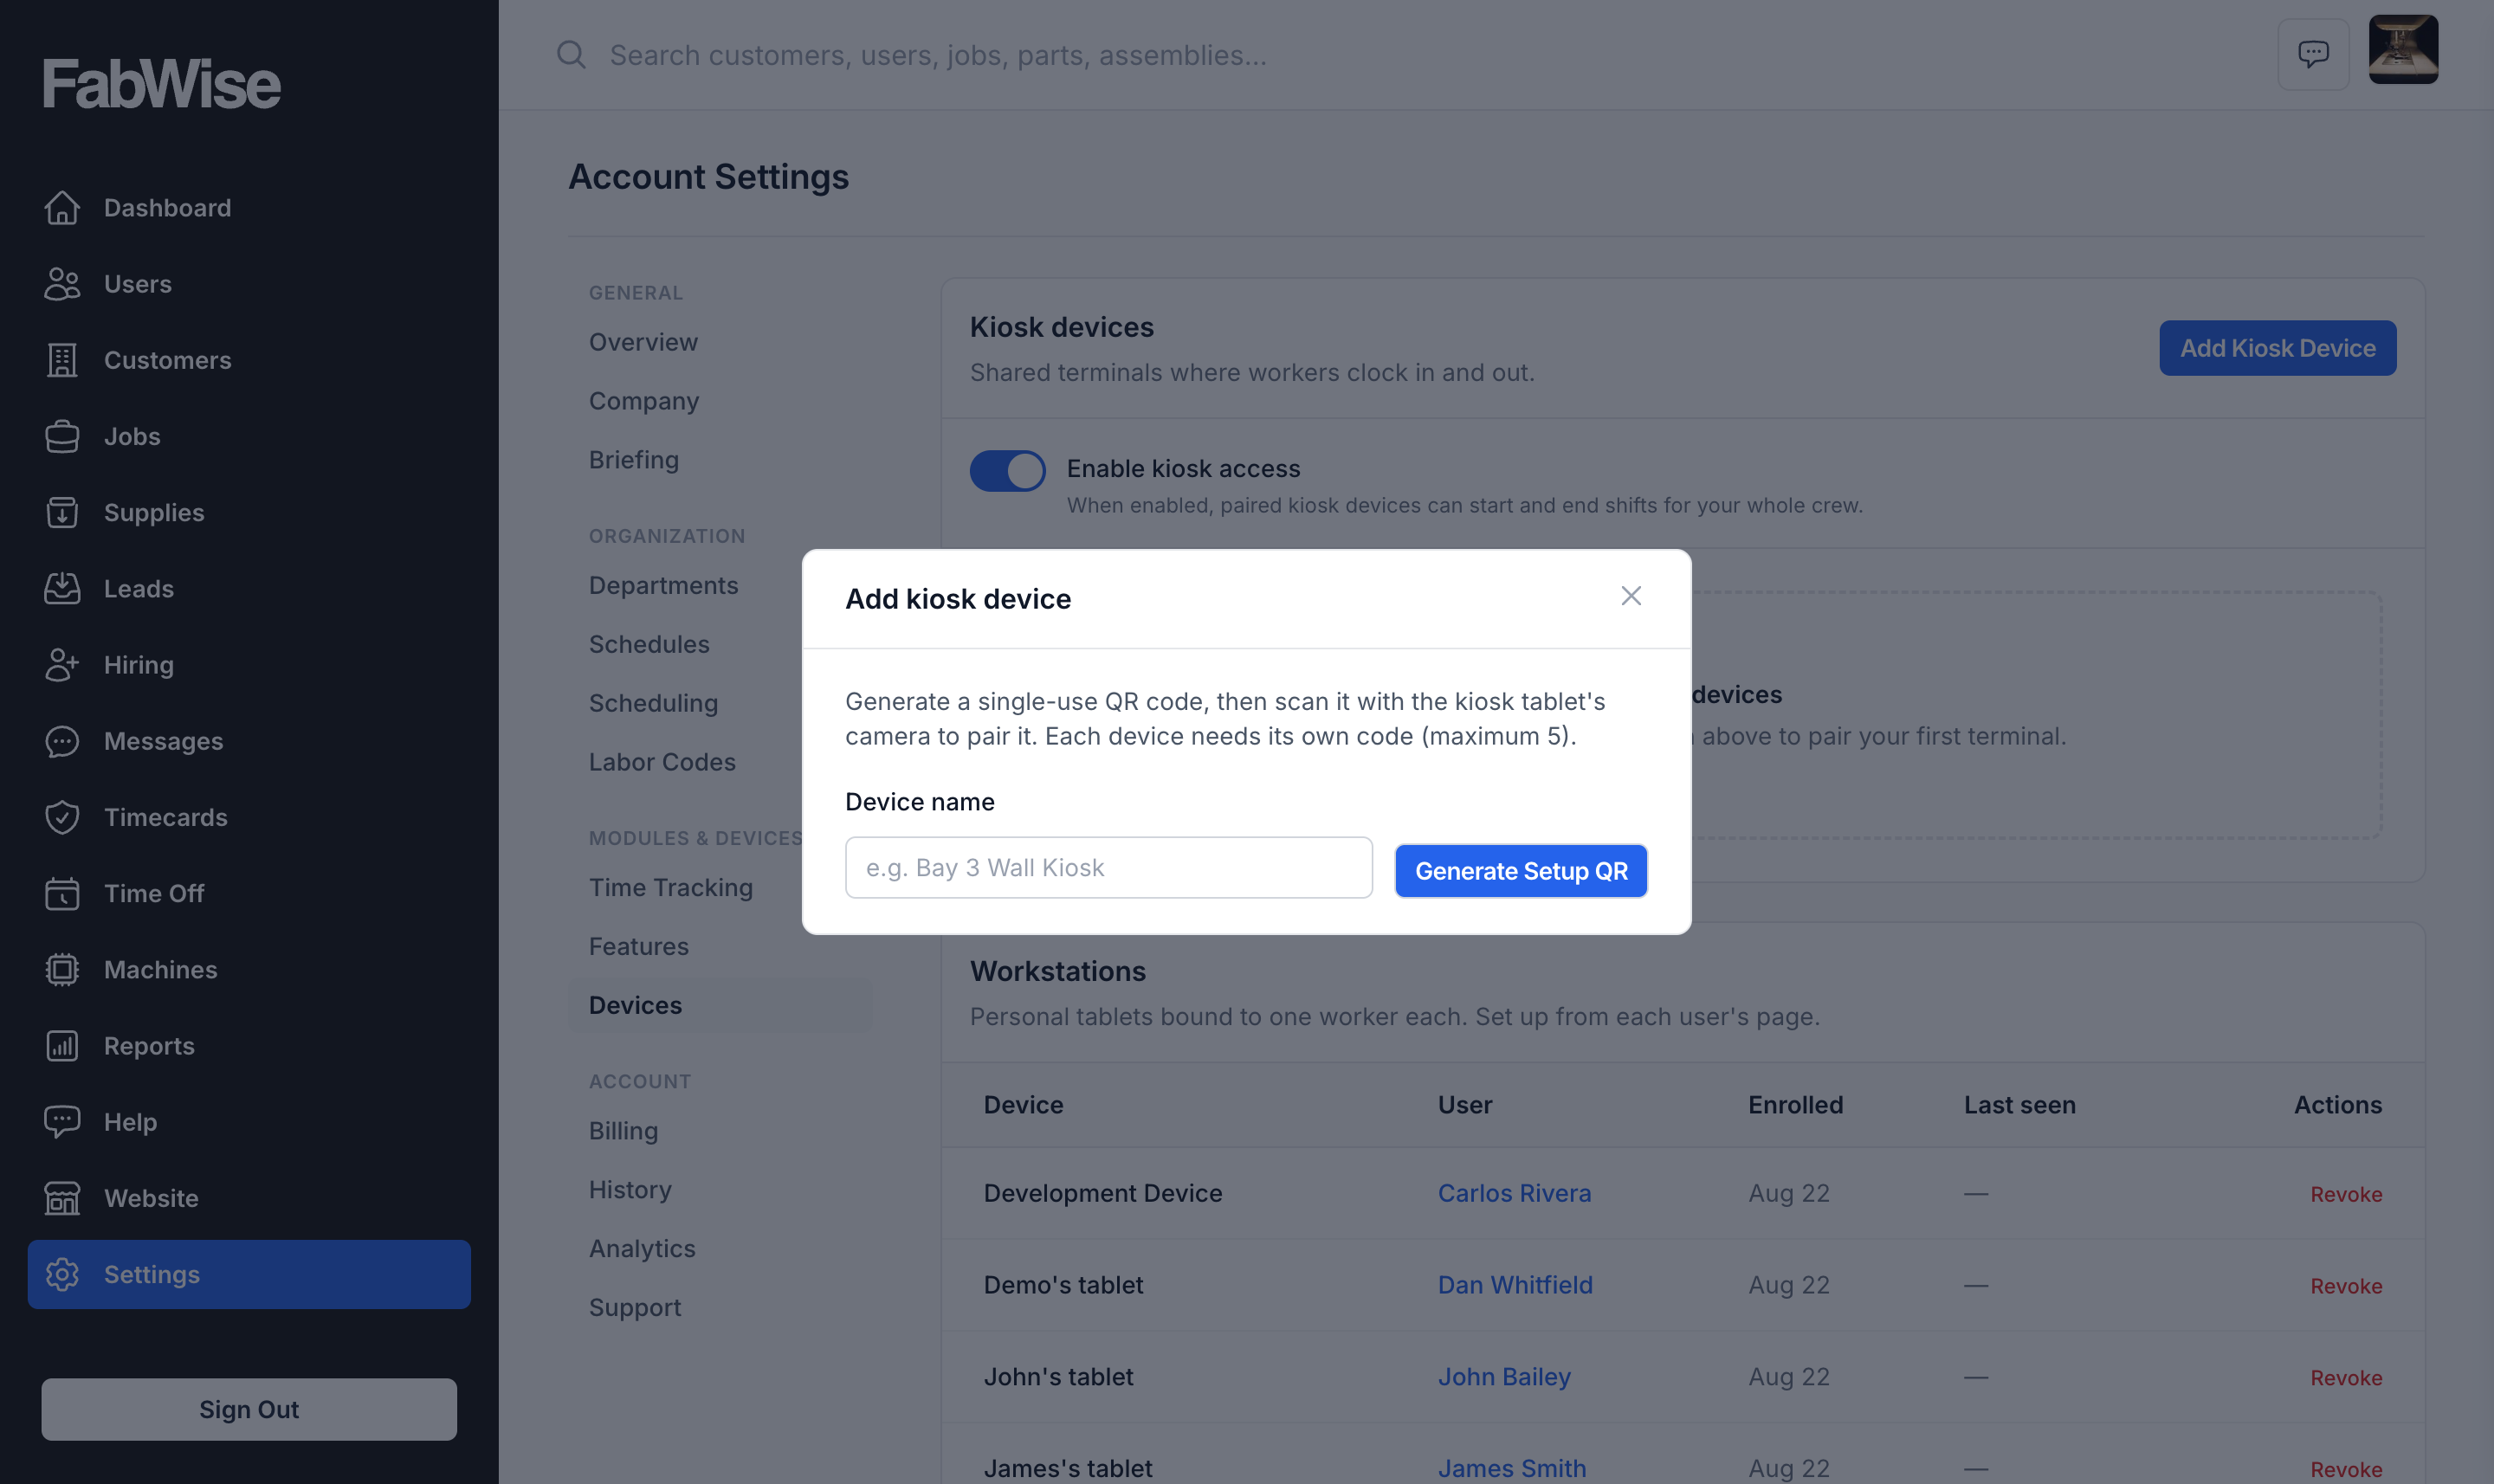
Click Add Kiosk Device, type a device name like "Shop Floor Kiosk," and click Generate Setup QR. A single-use QR code appears — each device needs its own (maximum 5).
On the tablet, open the camera and scan the QR code (or copy the link under the QR and open it in the tablet's browser). The tablet shows a confirm screen with the device name. Tap Set up this device.
The tablet is now paired and shows the worker list, ready for shift starts. Follow the full tablet setup guide to keep the screen on all day, lock the kiosk in place, and mount the tablet:
- Set Up an Android Tablet for the Kiosk
- Set Up an iPad for the Kiosk
Step 6. Have your first worker clock in (2 minutes)
The big moment.
- Walk over to the kiosk.
Find a worker's name in the list.
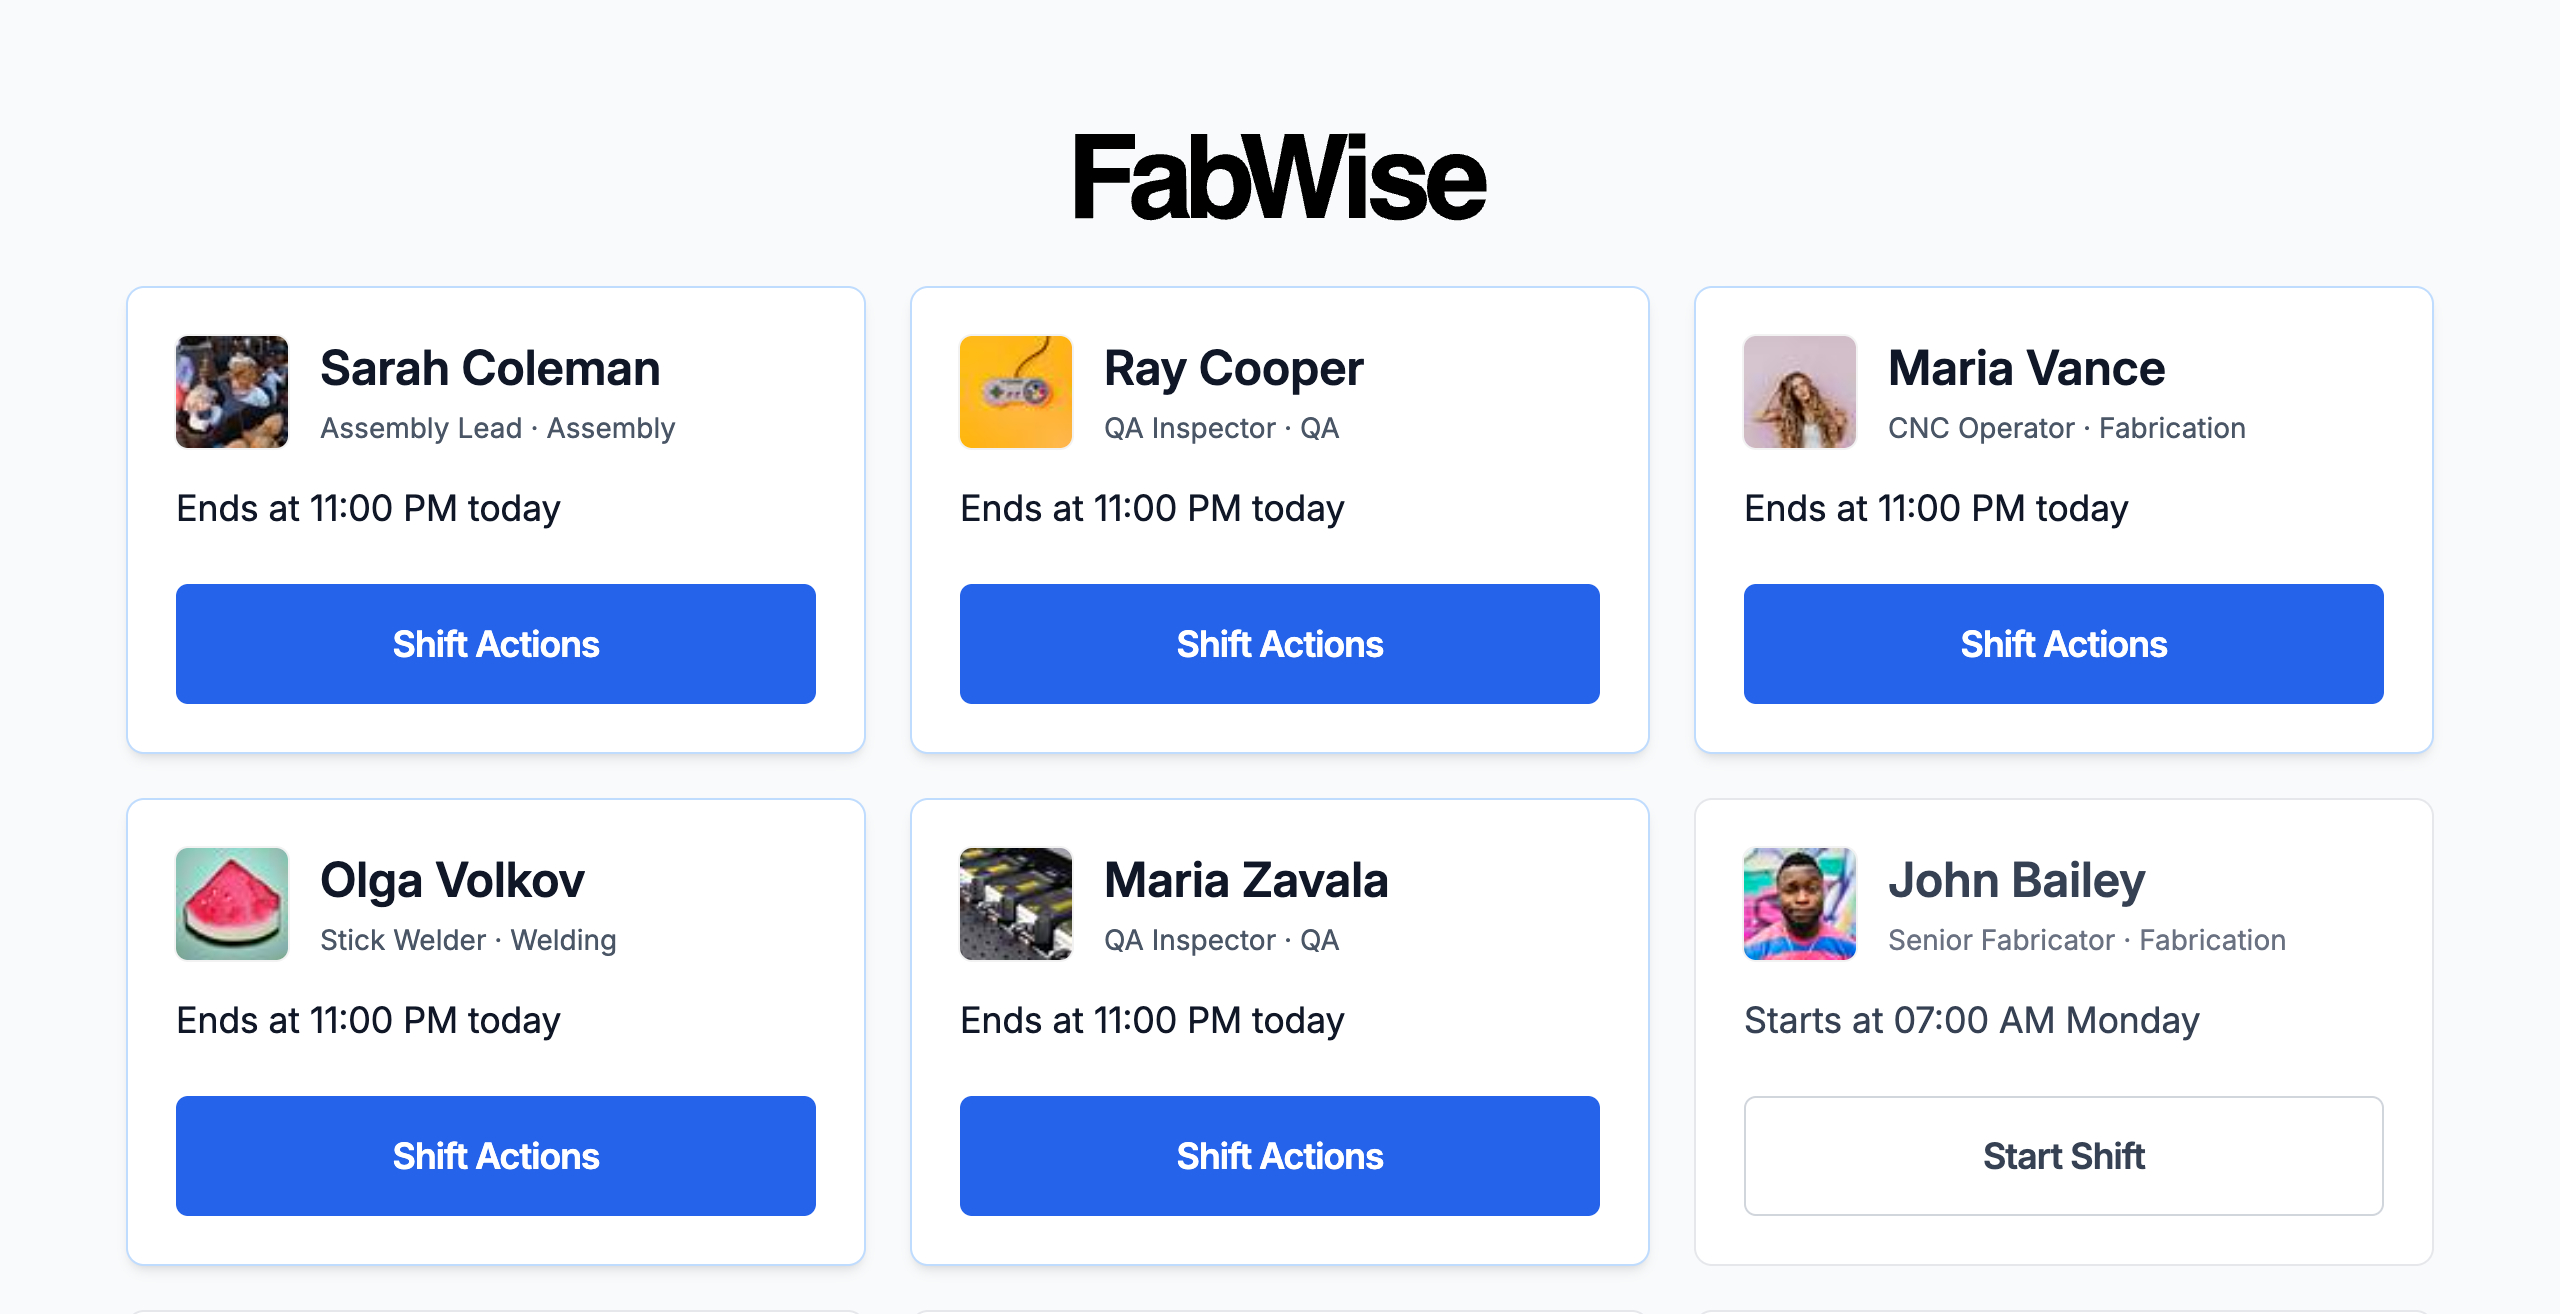
Tap their name.
Enter their PIN.
Tap Start Shift.
You should see a confirmation. Congratulations — FabWise is now tracking real time for a real worker.
If it didn't work, the two most common reasons:
- Worker's name doesn't appear — Kiosk access isn't turned on for them (their profile → Devices tab), or they're not in an active department.
- PIN rejected — typo on either the worker setup or at the kiosk. Try again carefully.
Optional: Set up Workstation on your phone (5 minutes)
Workstation is the per-worker app at workstation.fabwise.app. A worker's device is bound by scanning a QR code — no sign-in, no password. Set it up on your own phone so you can see what your workers see (and you'll need it eventually for your own time tracking if you also work the floor). Workstation is for time-tracked workers, so the profile needs Kiosk access on first.
- In admin, go to Users → open your own profile → Devices tab.
- In the Workstation card, click Set up tablet. A QR code appears — single-use, valid for 24 hours.
- Open your phone's camera and scan the QR code. A confirm screen shows your name.
- Tap Set up this tablet. The phone is now bound to you — no sign-in needed. Any device previously set up for you stops working.
- Add
workstation.fabwise.appto your home screen.
For the full per-platform guides, see Set Up Workstation on iPhone or iPad / Android / Mac / Windows.
Optional: Publish your Customer Portal (15 minutes)
Your Customer Portal is your public shop page at fabwise.app/shop/your-slug. It includes your capabilities, photos, hours, and a quote request form that drops leads into FabWise.
- Go to Website in the left nav.
- Click Edit.
- Pick a portal slug (e.g.,
acme-metalworks). - Add your tagline and description.
- Upload 4–8 photos of your shop and work.
- Check the capabilities, materials, industries, and certifications that apply.
- Set business hours and add social links.
- Under Publishing, check Enable website and Public listing.
- Click Save and then View Website.
For the full guide, see Set Up Your Customer Portal.
Where to go next
Things to do this week:
- Run a few shifts and review them. Go to Timecards in admin after workers have clocked in and out. Get familiar with the review queue.
- Export hours. At the end of your first pay period, go to Reports → Payroll and export the CSV. See Exporting Hours for Payroll.
- Enroll the rest of your team for Workstation. Send them the platform-specific setup guides.
- Configure per-supervisor push notifications on each supervisor's profile (Users → [supervisor] → Edit → Notifications) — Missed Shifts, Late Arrivals, Flagged Shifts.
Things to do this month:
- Add jobs and customers if you're using job costing
- Post a hiring listing on your Careers page if you're hiring
- Configure shift review settings to match your shop's tolerance for early/late
- Audit your worker list to confirm everyone is set up correctly
Common questions
Q: What if I make a mistake during setup?
A: Almost everything is reversible. Delete a department, rename a worker, change a schedule — none of it breaks existing data. The one exception is the website URL slug — changing it breaks any URLs you've already shared.
Q: How long until FabWise pays for itself?
A: Most shops report 1–2 hours per week saved per admin from automated time tracking and payroll prep. At a shop owner's hourly rate, that's typically less than the monthly cost.
Q: Can my workers do anything wrong that breaks something?
A: No. The worst case is a worker forgets to clock out or clocks in late — both are normal and FabWise has tools to fix them in shift review.
Q: Do I have to pay for the kiosk tablet?
A: Yes — the tablet is your hardware. We don't sell tablets; any Android tablet or iPad that meets the specs in the setup guides works fine. Budget tablets in the $150–$350 range are plenty.
Q: I'm stuck. Who do I ask?
A: Ask Foreman — it's in the drawer on every admin page and it can see your account. If you'd rather have a person, go to Help → Talk to a person → Contact support and open a ticket; replies land on that same Help page, where your tickets are listed. There's also the help search at the top of any help page.
Where to find it
- Sign-in:
admin.fabwise.app - Settings overview: Admin → Settings
- Add users: Admin → Users → Add User
- Pair a kiosk: Admin → Settings → Devices → Add Kiosk Device
- Public portal:
fabwise.app/shop/your-slug(once you publish it)
Related
- [Setting Up Departments and Workers](../admin/setting-up-departments-and-workers.md)
- [Schedules](../admin/scheduling.md)
- [Set Up an Android Tablet for the Kiosk](../kiosk/tablet-setup-android.md)
- [Set Up an iPad for the Kiosk](../kiosk/tablet-setup-ipad.md)
- [Set Up Your Customer Portal](../admin/customer-portal-setup.md)
- [Enroll a Worker for Workstation Access](../admin/enrolling-workers-for-workstation.md)
- [Setting Up Your Shop](setting-up-your-shop.md)