
Setting Up Departments and Workers
Get your team into FabWise. Create departments, add workers, give them PINs, and have everyone clocking in on the kiosk by the end of the day.
Why it matters
Everything in FabWise hangs off your team structure. Workers clock in with PINs tied to their user profile. Shifts are generated from the schedule assigned to their department. Hours roll up to payroll grouped by user. Job costs roll up by labor rate per worker.
Without a clean team setup, none of it works. Get this part right once and the rest of FabWise mostly takes care of itself.
Plan on 30 minutes for a 10-person shop, longer if you're entering 30+ workers.
What you'll need
- A list of your workers with: first name, last name, email (if they have one), department, hourly rate or salary
- 4-digit PINs for each shop floor worker (workers can choose their own later, or you can assign one initially)
- An idea of your supervisor / reporting structure
- Who needs admin access vs. who's a shop floor worker
You don't need everyone's information up front. You can add workers as you go.
Step 1. Create your departments
Departments are how you organize your team. Examples: Production, Assembly, QA, Shipping, Office. Each department gets one schedule (its work hours) and one or more workers.
- Sign in to admin.fabwise.app as an account owner.
- Go to Settings → Departments.
- Click Add Department.
- Fill in:
- Name — what you call it day-to-day (e.g., "Production", "Day Shift Welders")
- Code (optional) — short identifier shown alongside the name (e.g., "PROD", "DSW"). Useful for shops with many departments.
- Description (optional) — for your own reference
- Schedule (optional, set later) — the schedule template this department follows. If you don't have schedules set up yet, leave it for now — see Schedules to create them.
- Active — leave checked
- Click Save.
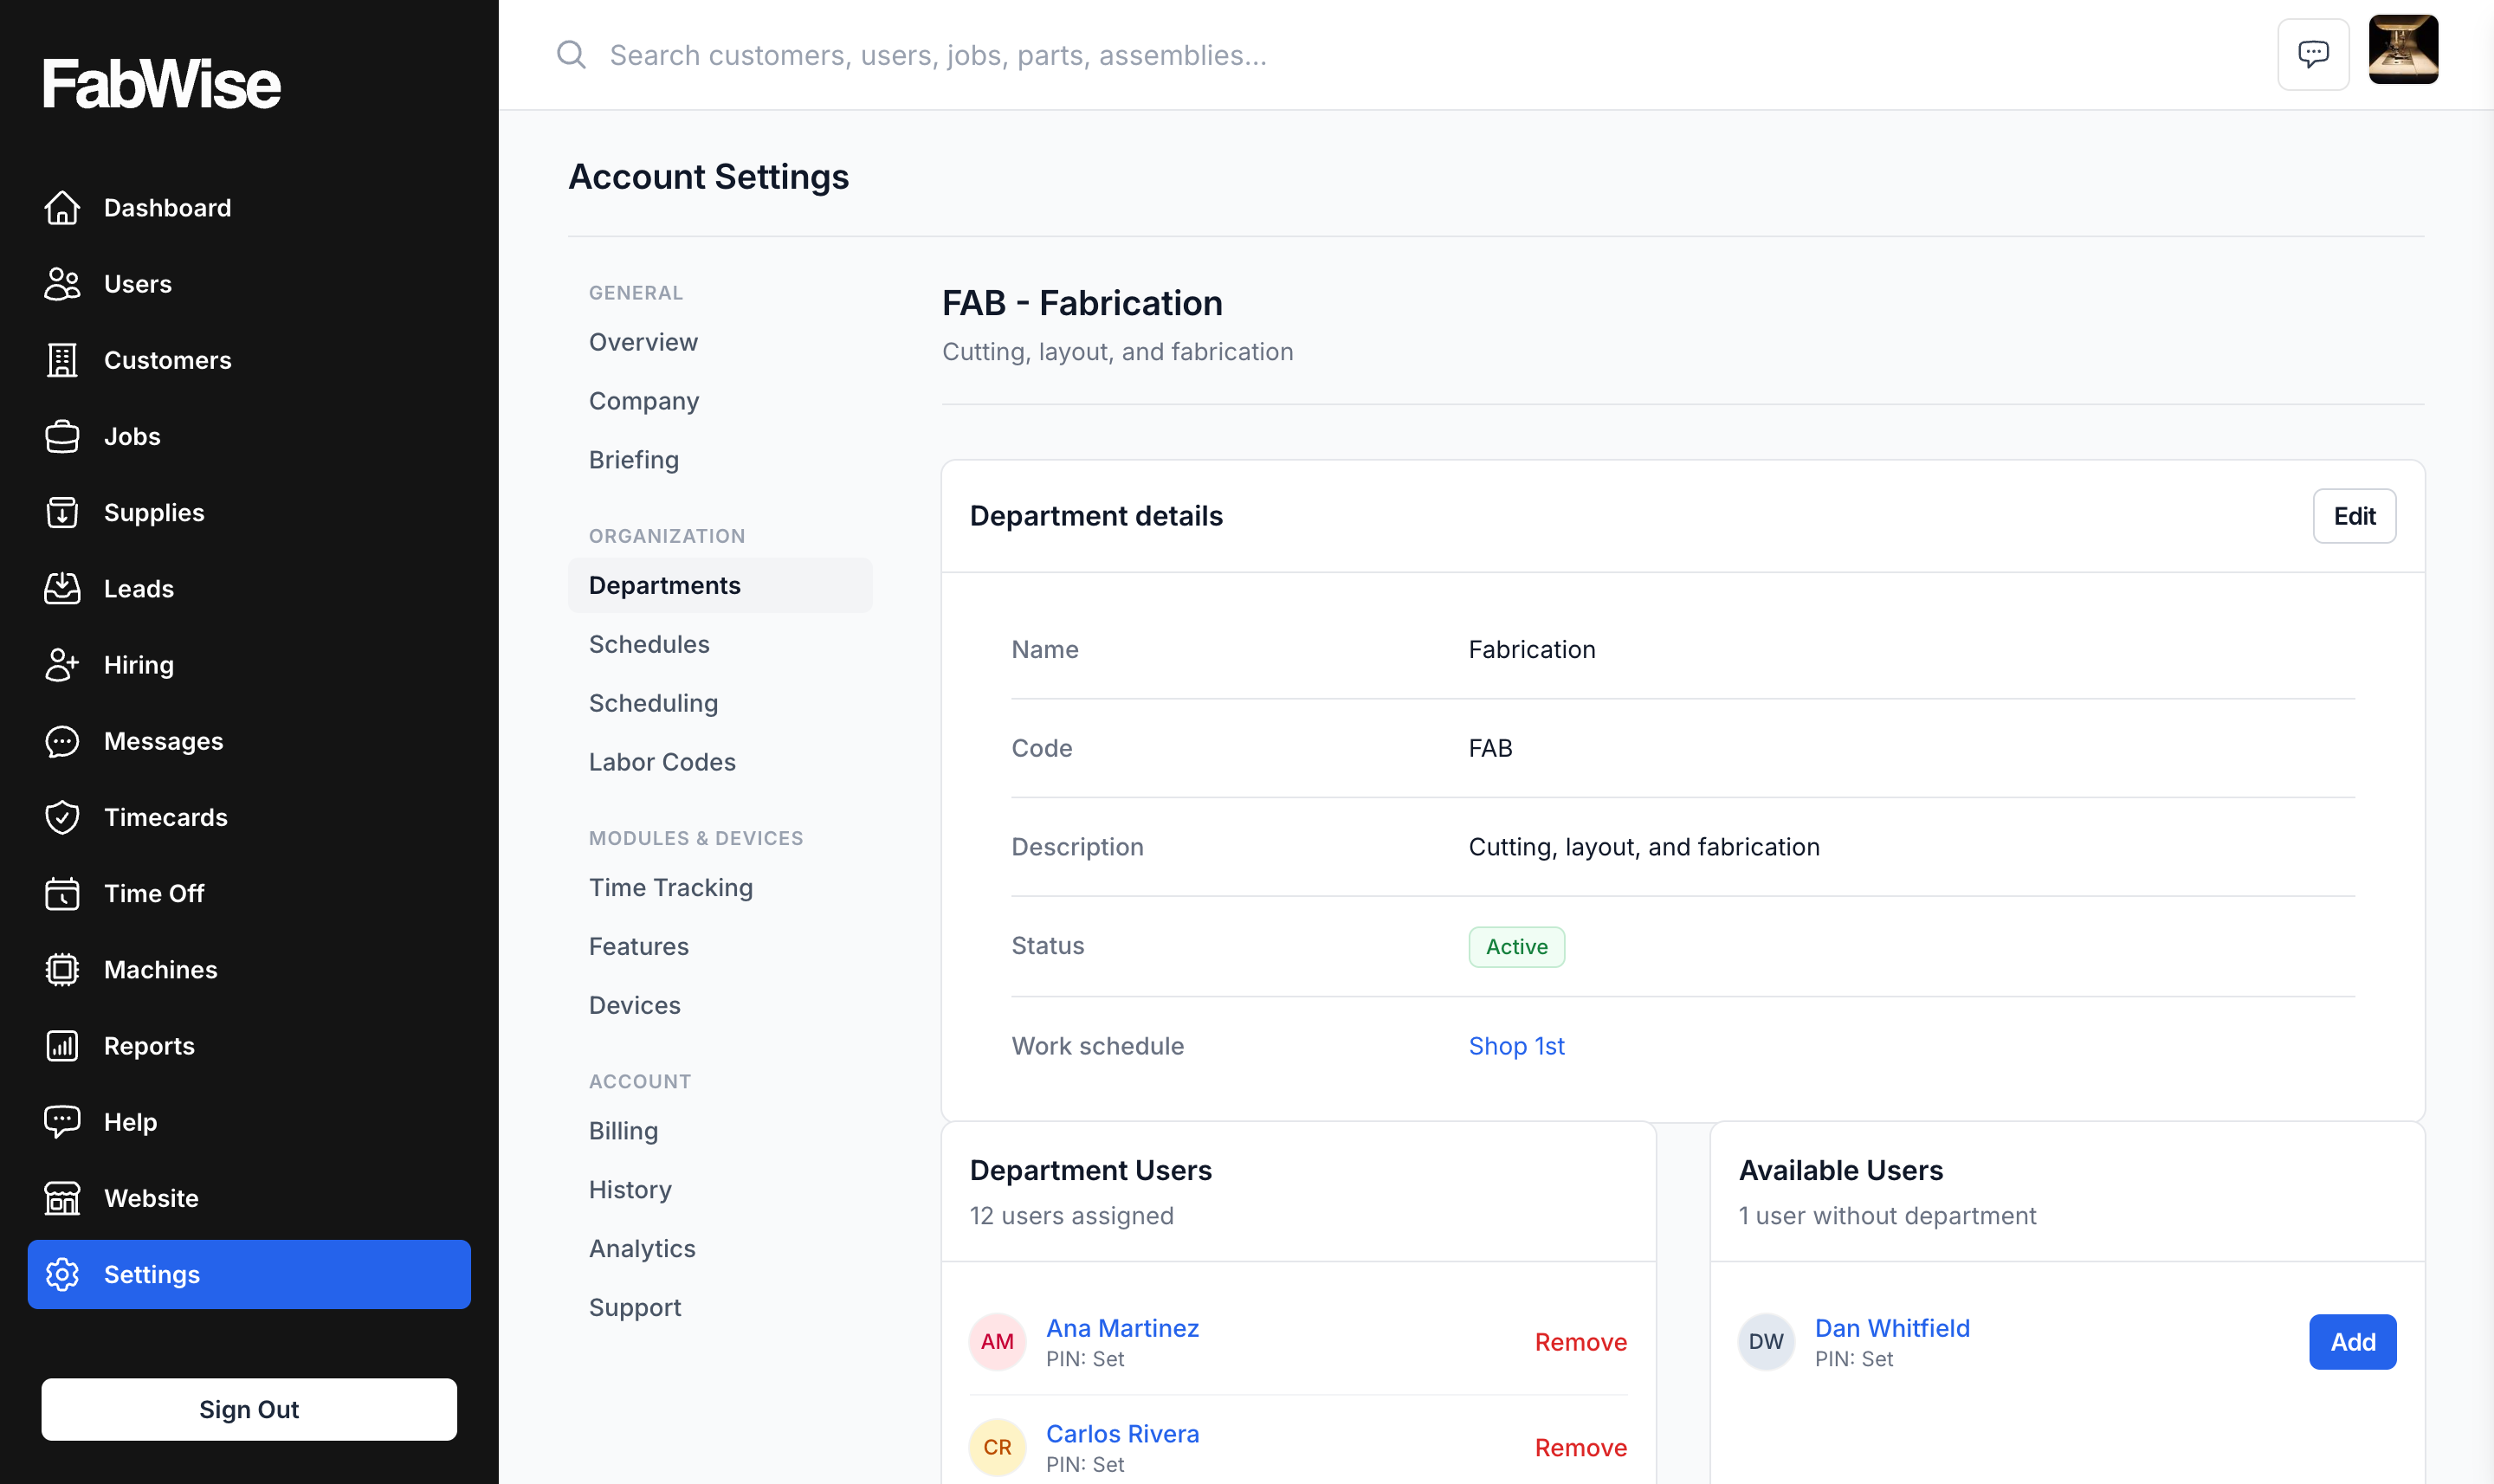
Repeat for each department. Most small shops have 2–5 departments. If you're not sure, start with 2 or 3 and split later as you need to. Re-organizing is easy.
Step 2. Add your first worker (shop floor)
A shop floor worker is anyone who clocks in to track time — welders, machinists, fabricators, finishers.
Go to Users in the left nav.
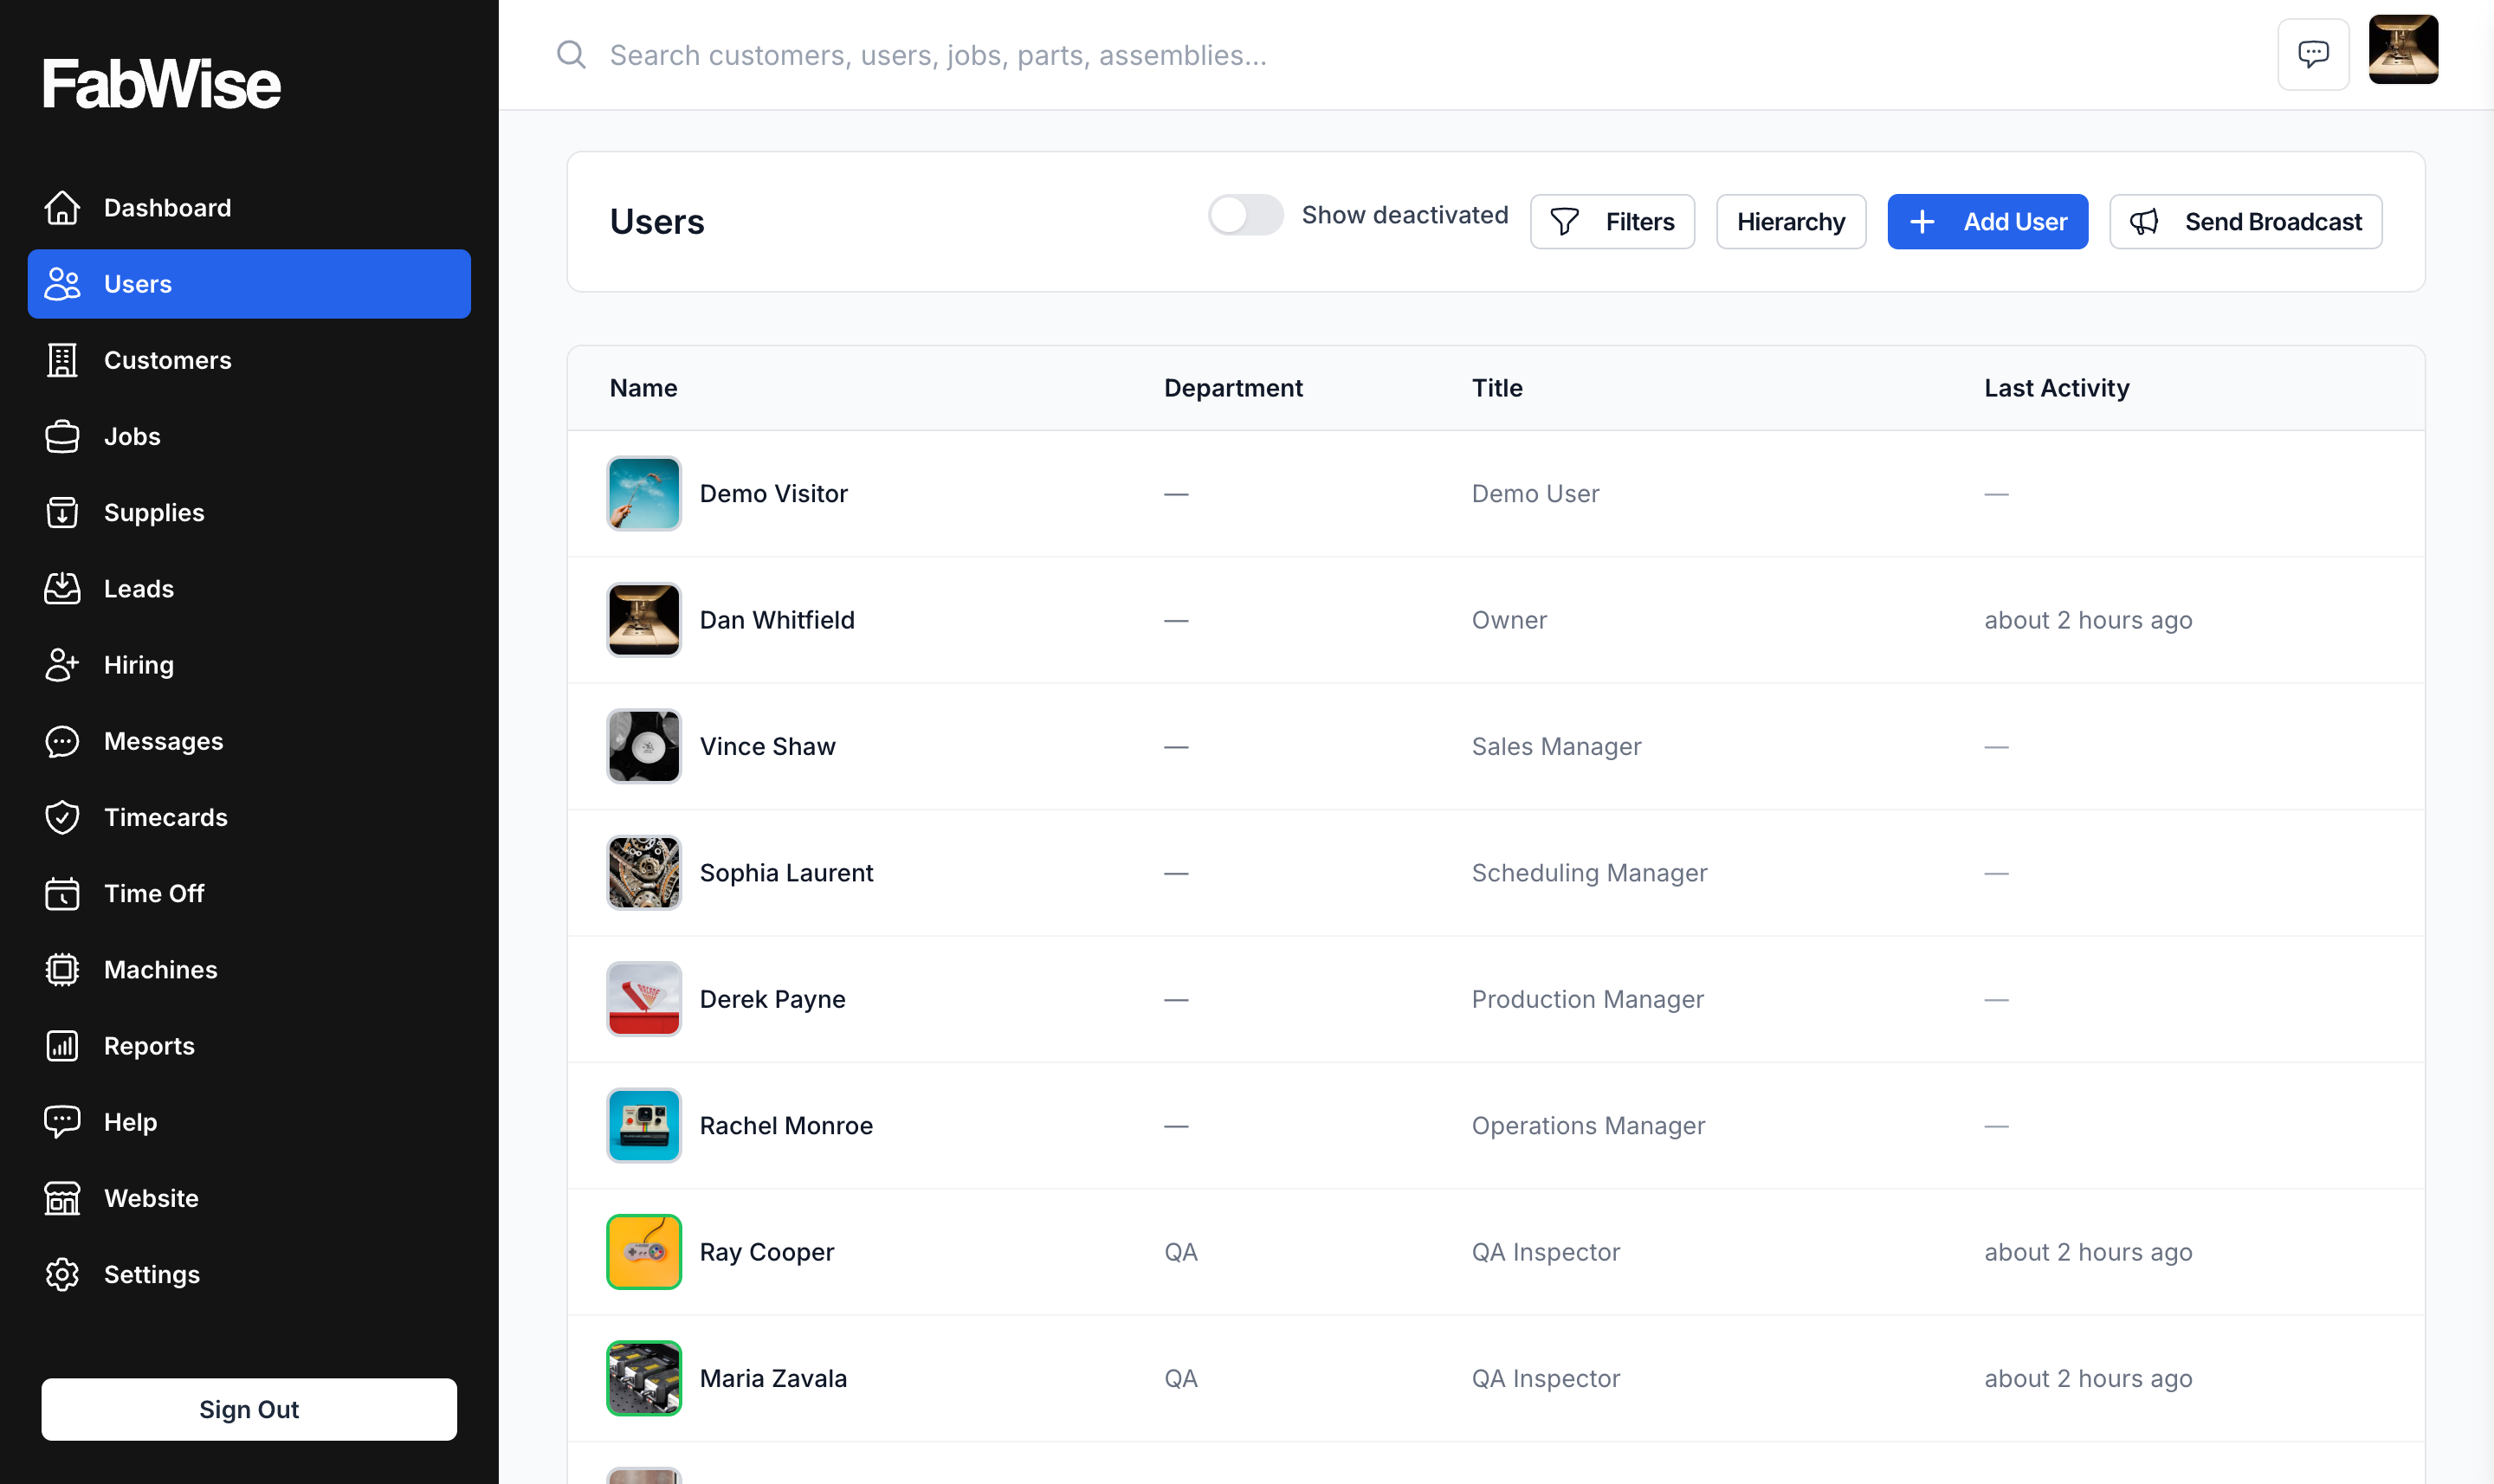
Click Add User.
Enter their first and last name — the form captures name only. Click Create user.
Configure the worker on their profile:
Kiosk access and PIN (Devices tab):
- Open the Devices tab and turn on Kiosk access. This marks them as a time-tracked kiosk worker and reveals the PIN field.
- PIN — 4 numeric digits. The worker uses this to identify themselves at the kiosk. PINs must be unique across your account, so don't use 1234 for everyone.
Details:
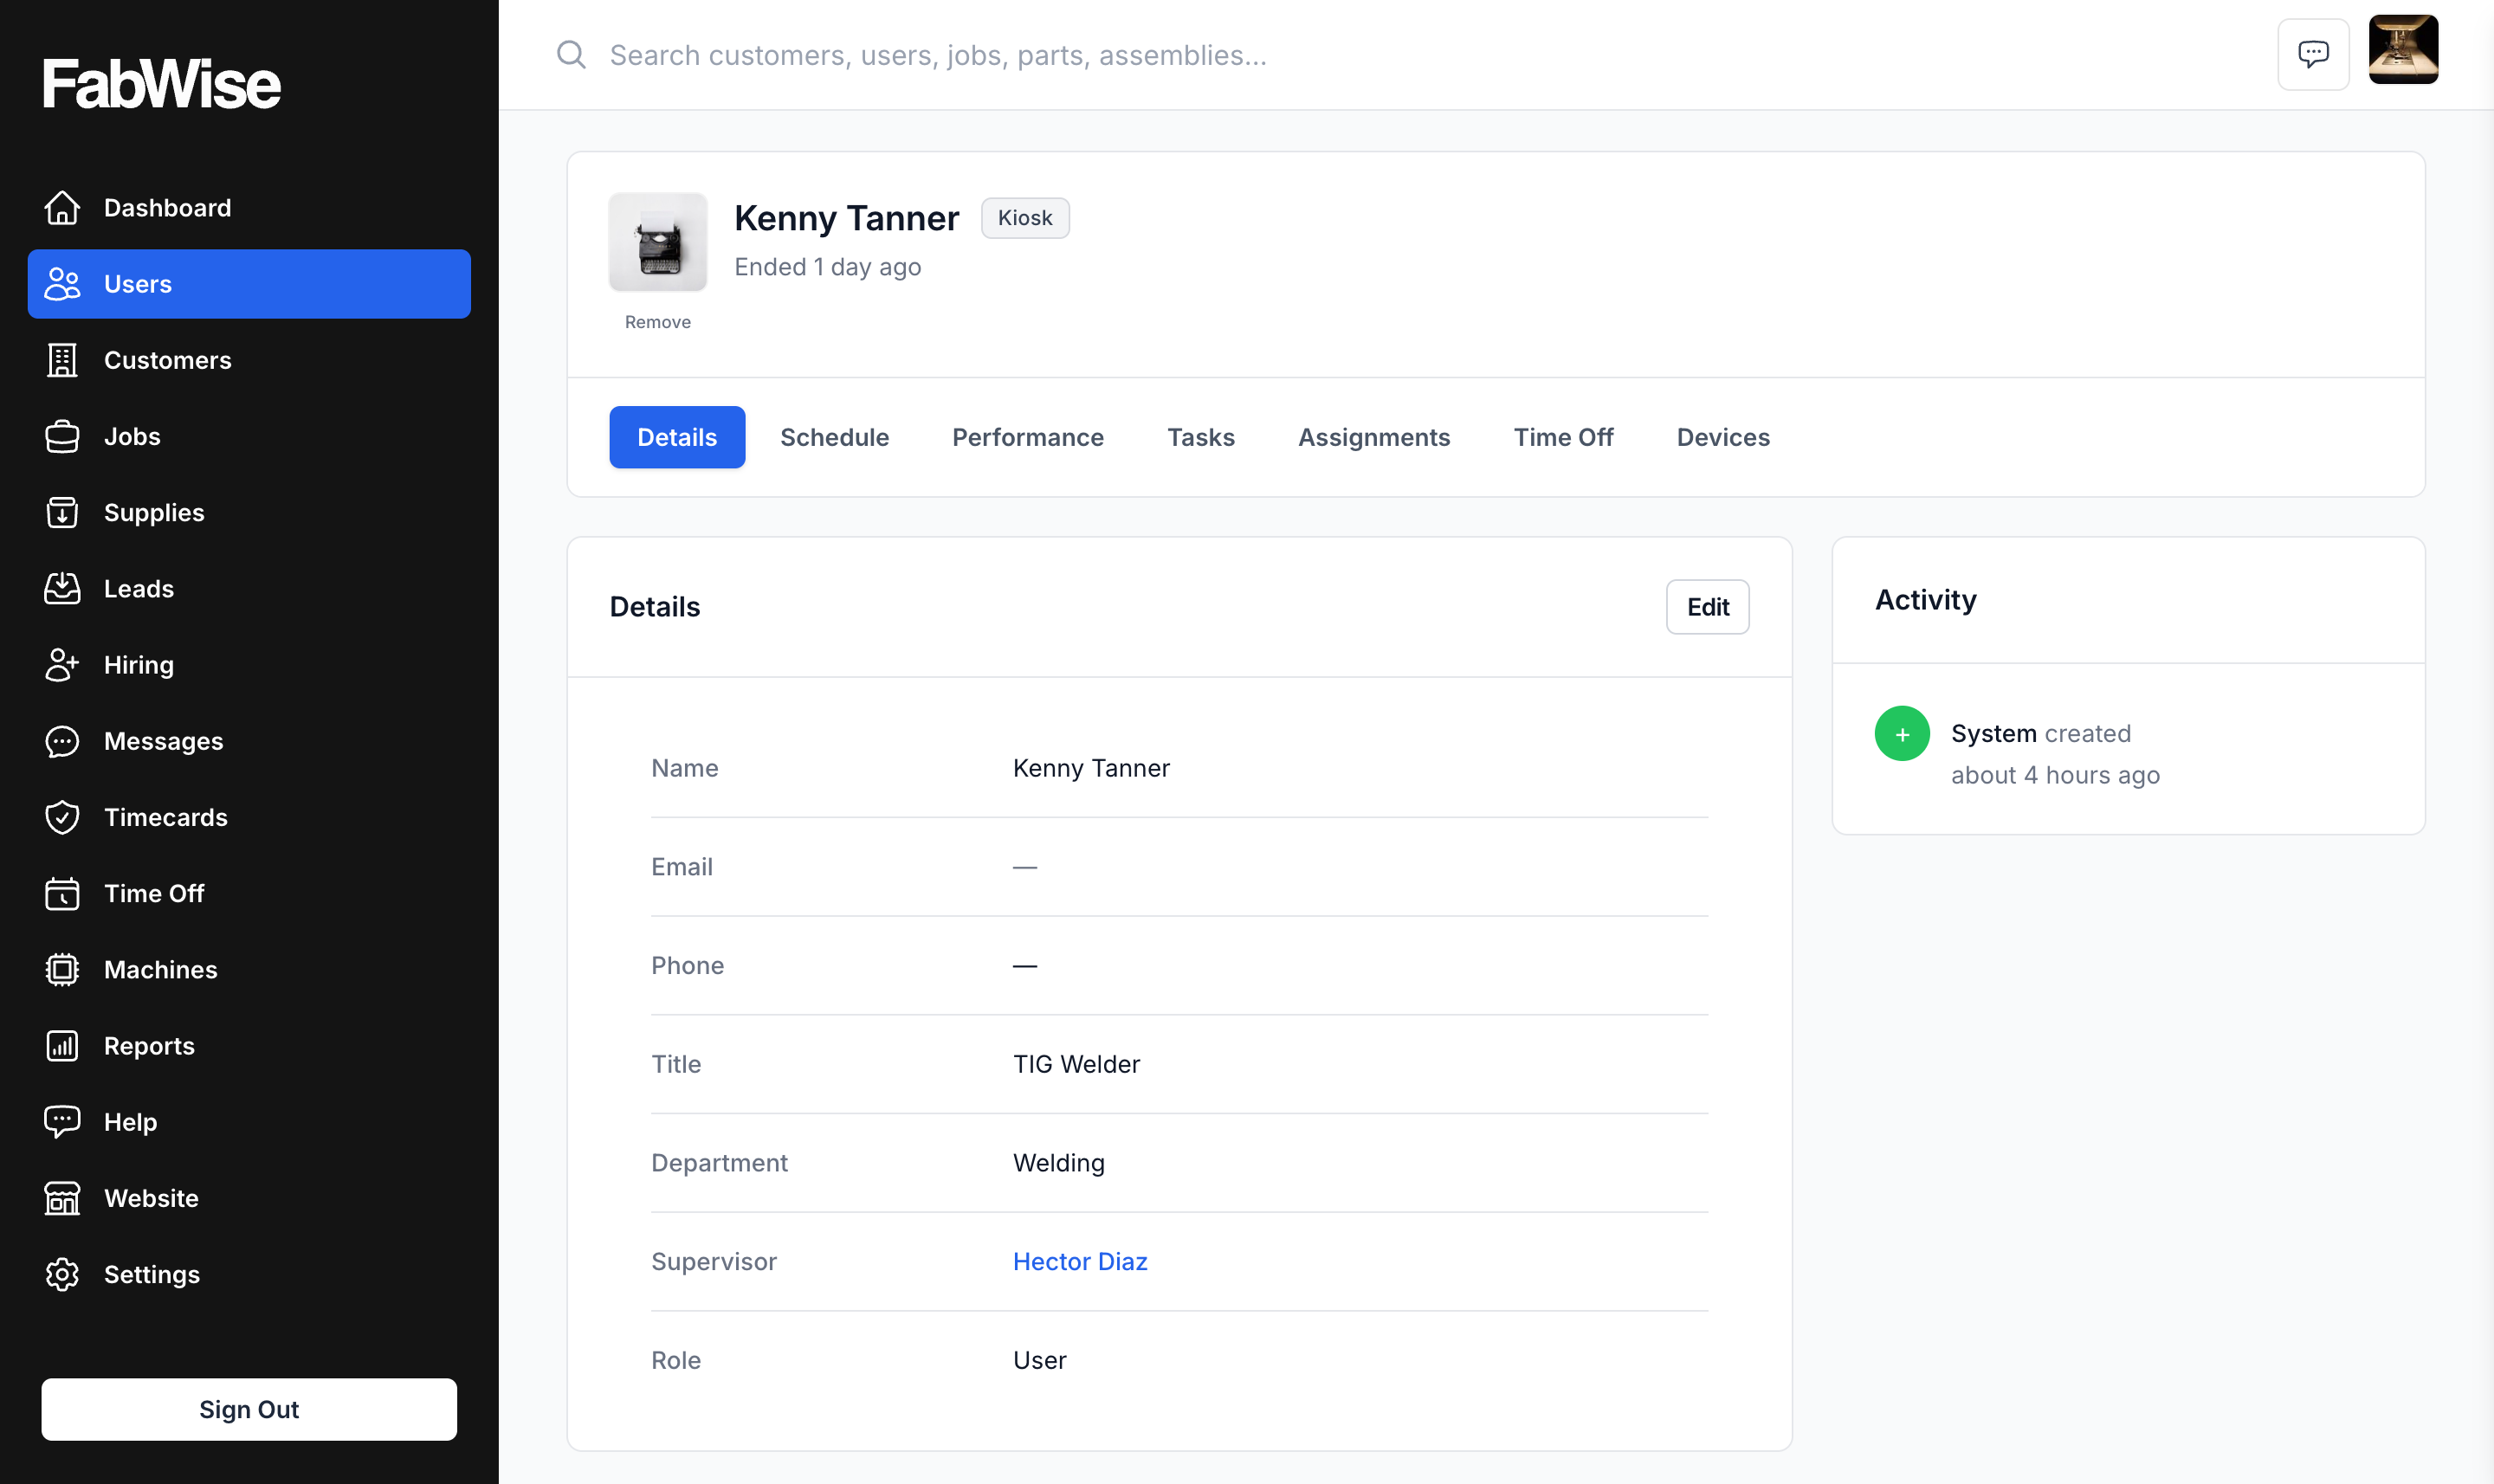
- Department — pick one from Step 1. This drives their schedule and supervisor assignment.
- Title — what shows next to their name on the kiosk (e.g., "TIG Welder").
- Supervisor — who reviews their shifts (optional).
- Email and phone — optional for shop workers.
Schedule:
- By default the worker follows their department's schedule. A per-worker override is available on their profile for the few people who work different hours than the rest of their department.
For job costing:
- Hourly rate — what this worker costs your shop per hour (used for job cost calculations, not for payroll). Optional but recommended.
The worker is now in your account. They can clock in at the kiosk the next time their PIN matches.
Step 3. Add your office team
Office users (admins, managers, supervisors) need different fields than shop workers.
- Go to Users → Add User.
- Enter their first and last name and click Create user.
On their profile, add their email — required for office users, since they sign in with an emailed link or a passkey — and pick a Role:
- Account Owner — full access, billing, can delete the account. Usually just one or two people.
- Admin — full operational access. Can create users, manage settings, see all reports.
- Manager — can review shifts and run reports across the whole shop. Can't change account settings.
- Supervisor — can review shifts for their direct reports only.
Click Save.
Office users sign in at admin.fabwise.app — there's no password to set. They get an emailed sign-in link, and can enroll a passkey for one-tap sign-in going forward.
Step 4. Assign supervisors
Supervisors review shifts for the workers reporting to them. Set up the reporting structure:
- Go to Users.
- Open each shop worker's profile.
- In the Supervisor field, pick their direct supervisor from the dropdown.
Click Save.
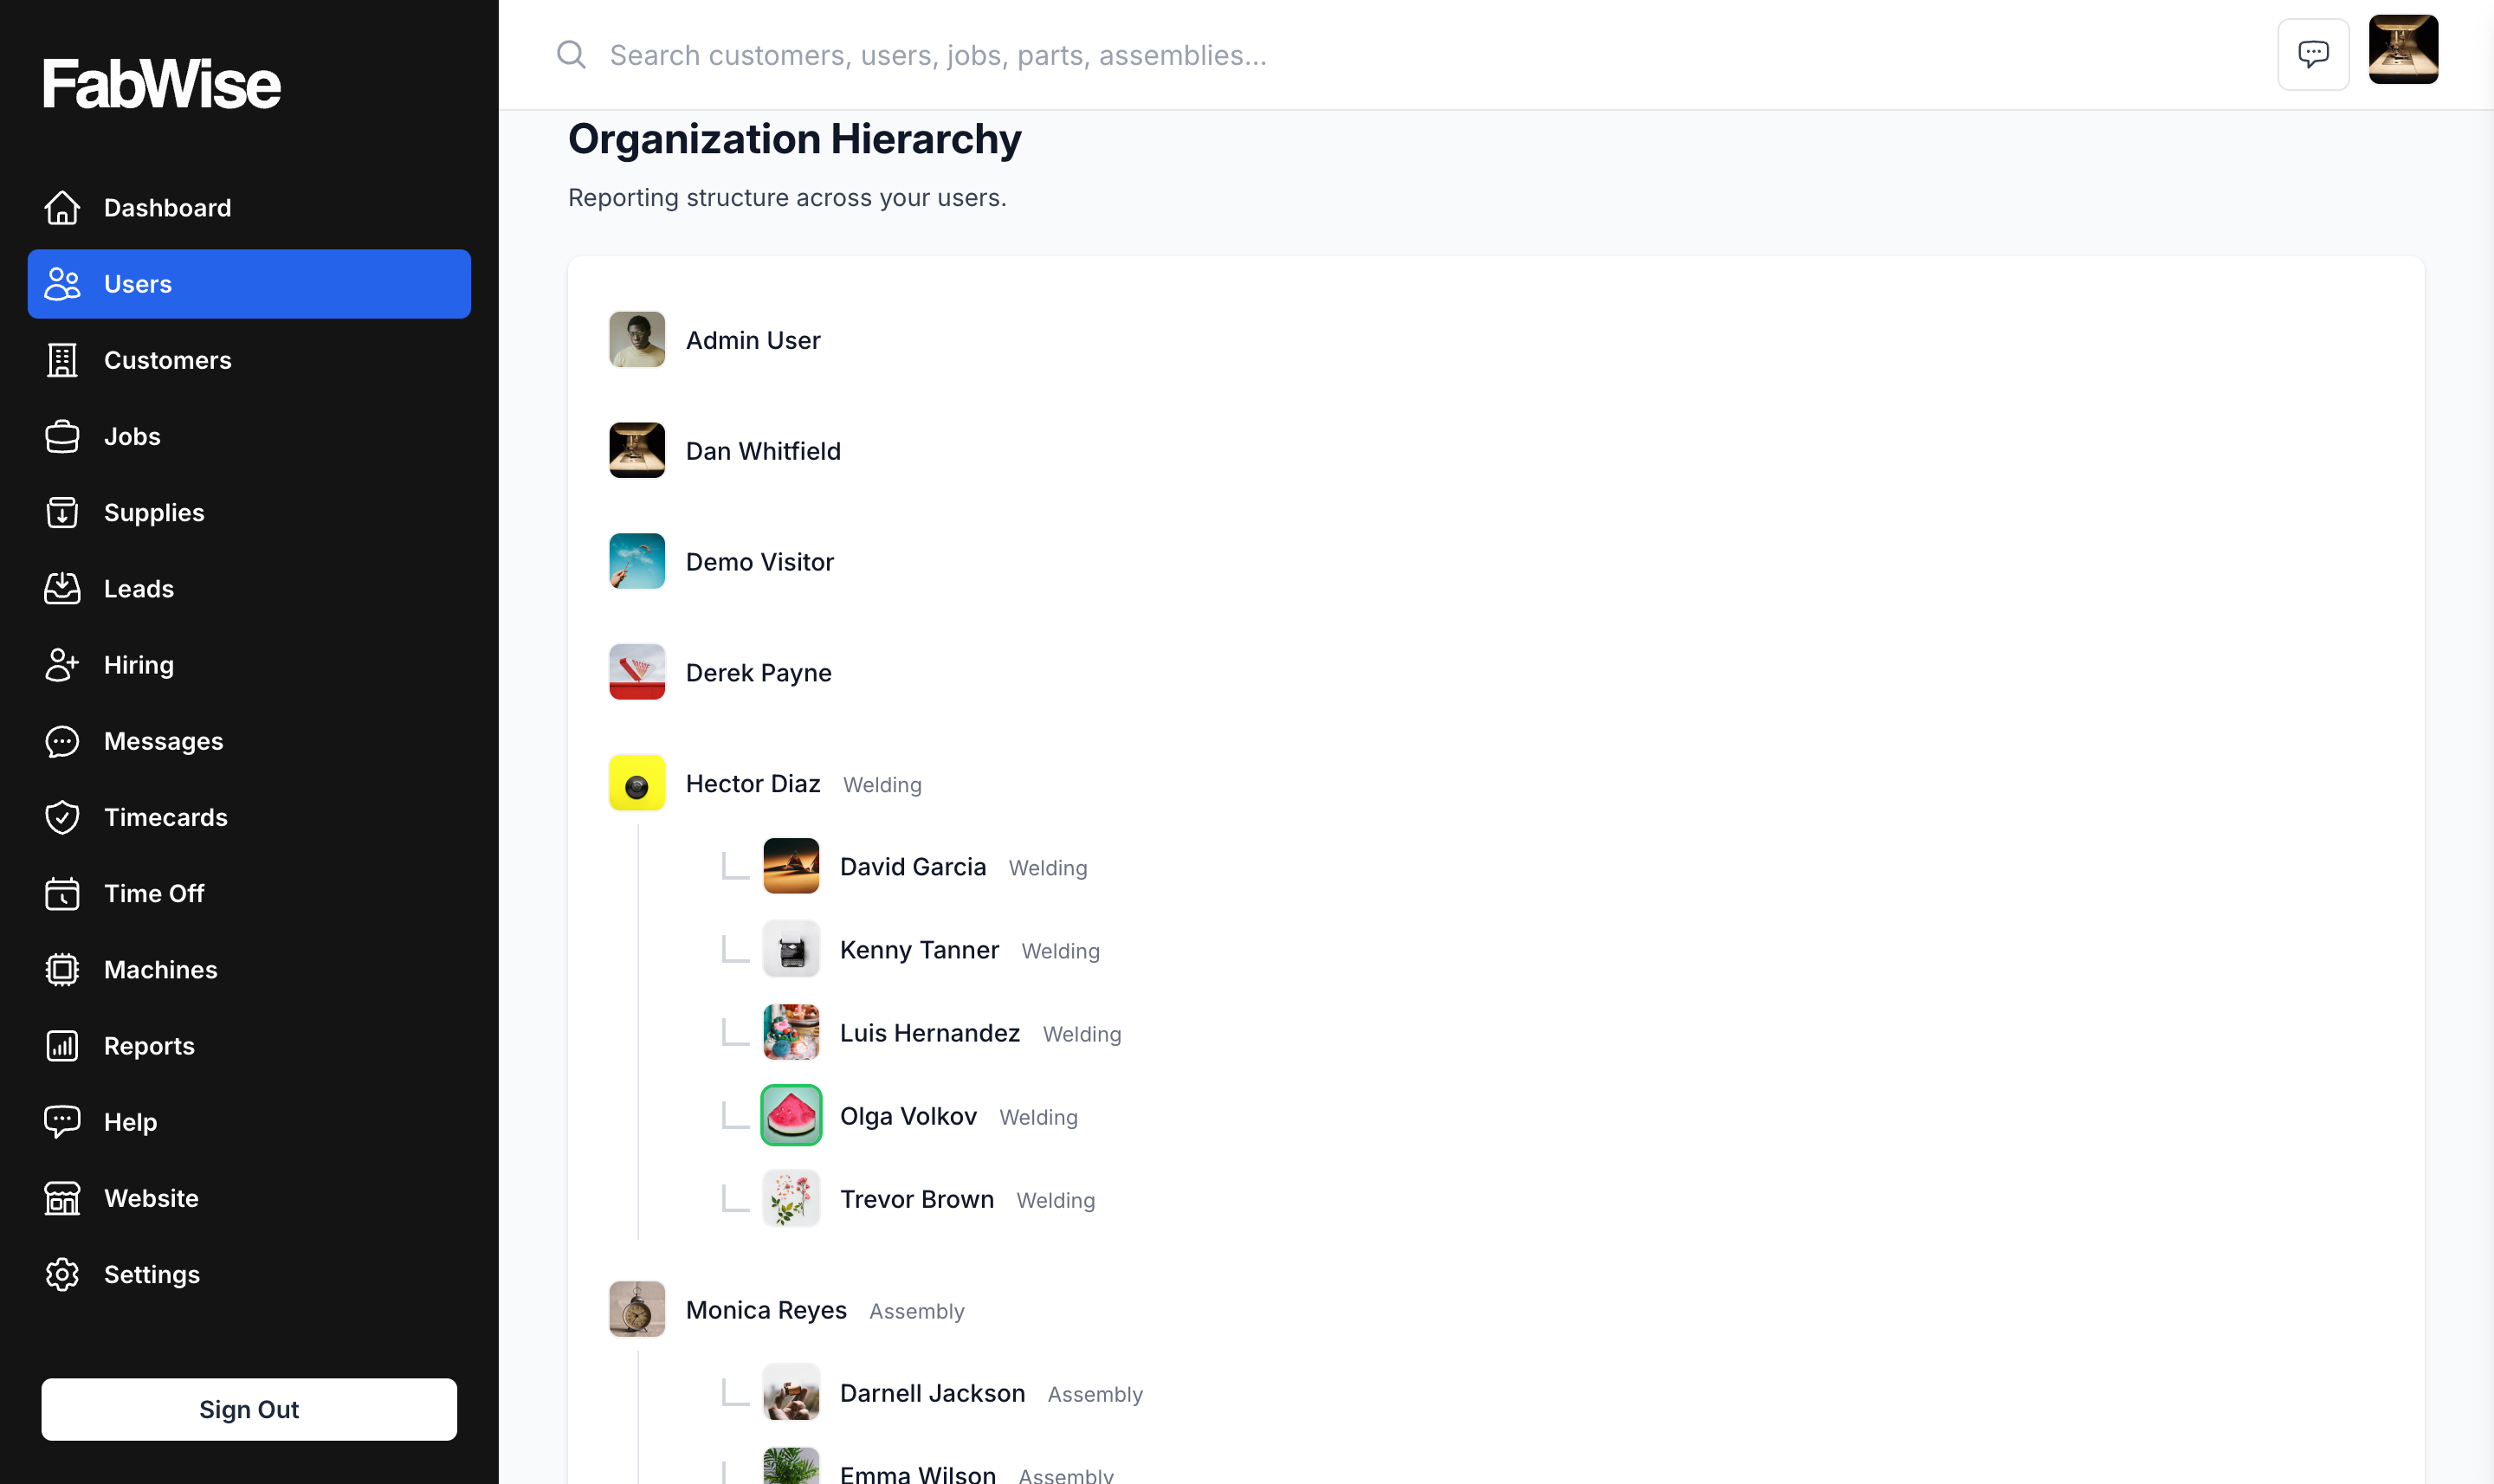
You can see the full reporting structure at Users → Hierarchy (or Org Chart). It shows office users at the top with their direct reports beneath.
If you don't have supervisors yet, leave the field blank. Admins can review everyone's shifts.
Step 5. Set hourly rates
Hourly rates power job costing — when a worker tracks time on a job, FabWise multiplies their hours by their rate to get labor cost.
Important: the hourly rate in FabWise is for job costing only, not payroll. Your payroll provider (ADP, Gusto, QuickBooks) handles the actual pay rate. Workers don't see their FabWise hourly rate; admins and managers do.
- Go to Users → open each worker's profile.
- Set Hourly Rate to what they cost your shop per hour, fully loaded if you want — including burden (taxes, benefits, overhead) — or just their wage. Be consistent across workers.
- Click Save.
Salaried office workers can have an Annual Salary instead. FabWise calculates an effective hourly rate from the salary for job costing purposes.
If you don't want to bother with rates per worker, you can set a single shop-wide default in Settings → Job Costing. Per-worker rates override the default.
Step 6. Verify it's working
Once you have a couple of workers in place:
- Have one of them go to the kiosk
- Find their name in the worker list
- Enter their PIN
- Start a shift
If they can clock in cleanly, you're set up. If their name isn't in the list, check that Kiosk access is on (their profile → Devices tab).
What to do next
After your team is in place, the natural next steps are:
- Set up schedules — assign one to each department so FabWise knows what shifts to expect. See Schedules.
- Pair a kiosk tablet — get a physical kiosk in the shop. See Set Up an Android Tablet for the Kiosk or Set Up an iPad for the Kiosk.
- Enroll workers for Workstation — if you want workers to have their own personal FabWise view on their phone. See Enroll a Worker for Workstation Access.
Adding workers later
The workflow above works just as well for the first ten workers as for adding one at a time over months. Whenever you hire someone:
- Add their user profile (Step 2)
- Assign their department (existing one or new)
- Assign their supervisor
- Set their hourly rate
- Give them their PIN
If you hired them through the Careers page, FabWise pre-fills the new-user form with the applicant's name when you mark them as Hired. You finish the setup on their profile.
Removing workers
When a worker leaves:
- Open their profile
- Set Termination Date
- Set status to Inactive (or Terminated)
- Save
They no longer appear in the kiosk worker list. Their historical shifts and hours stay intact for reports and audit. If they had a Workstation device enrolled, revoke it under their Devices tab.
Don't delete the user record — you'll lose their history. Marking inactive is the right answer.
Bulk import
If you have 20+ workers to enter and you'd rather upload a CSV than type each one in, talk to support — we have a bulk import tool we can run for you. Not yet self-service, but coming.
Where to find it
- Departments: Admin → Settings → Departments
- Users: Admin → Users
- Add user: Admin → Users → Add User
- Org chart: Admin → Users → Hierarchy
- Hourly rates: per-worker on their profile
- Who can manage users + departments: account owners and admins
Related
- [Schedules](scheduling.md)
- [Managing Users](managing-users.md)
- [Set Up an Android Tablet for the Kiosk](../kiosk/tablet-setup-android.md)
- [Enroll a Worker for Workstation Access](enrolling-workers-for-workstation.md)